
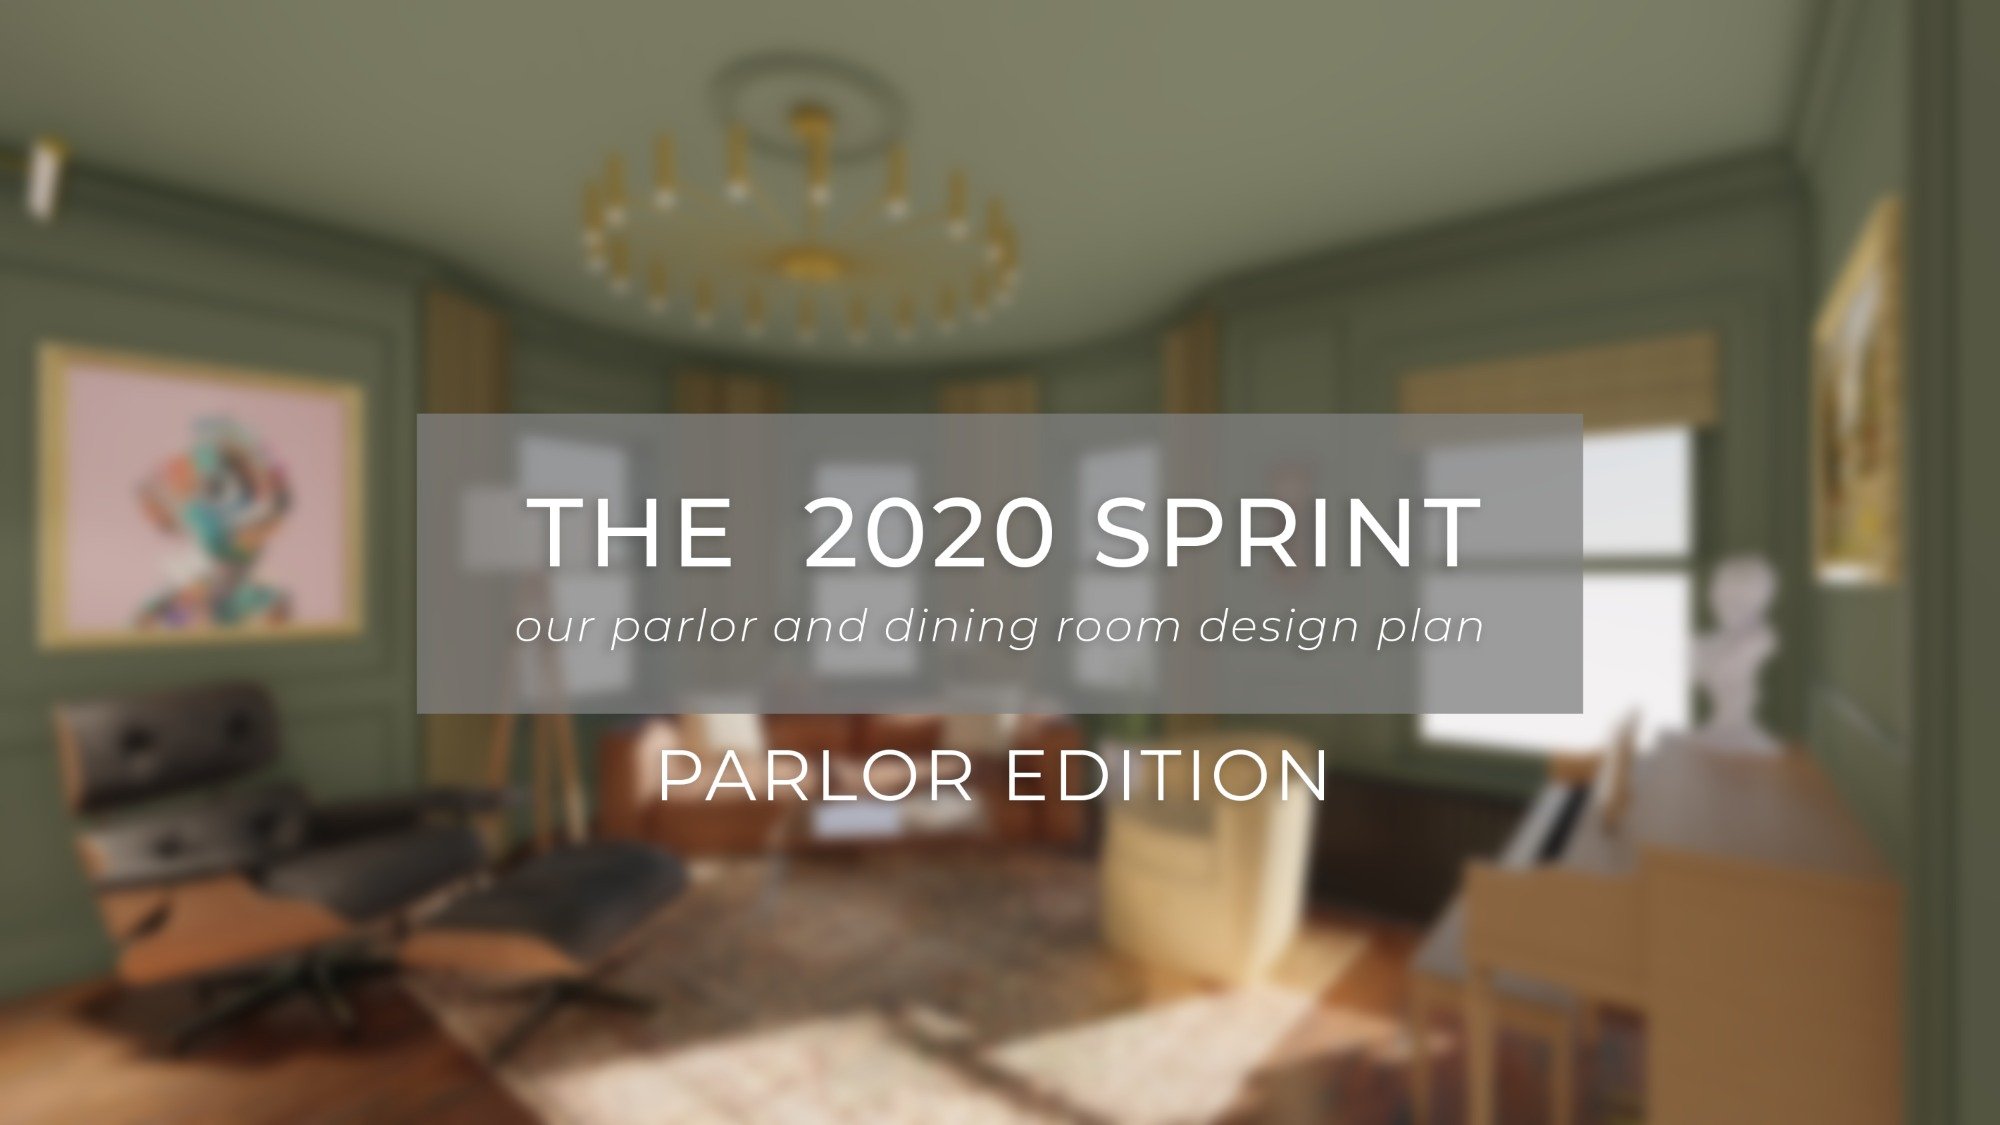
Parlor Design Plan
Our Promise
Last year we made a promise that we would not have another Christmas Tree without trim on the windows. So, like the good promise keepers we are, we started to renovate the Parlor in the beginning of 2020. Then the One Room Challenge (and Covid) happened. Needless to say, the first floor projects were derailed but we are SO READY to get them back on track.
The Project
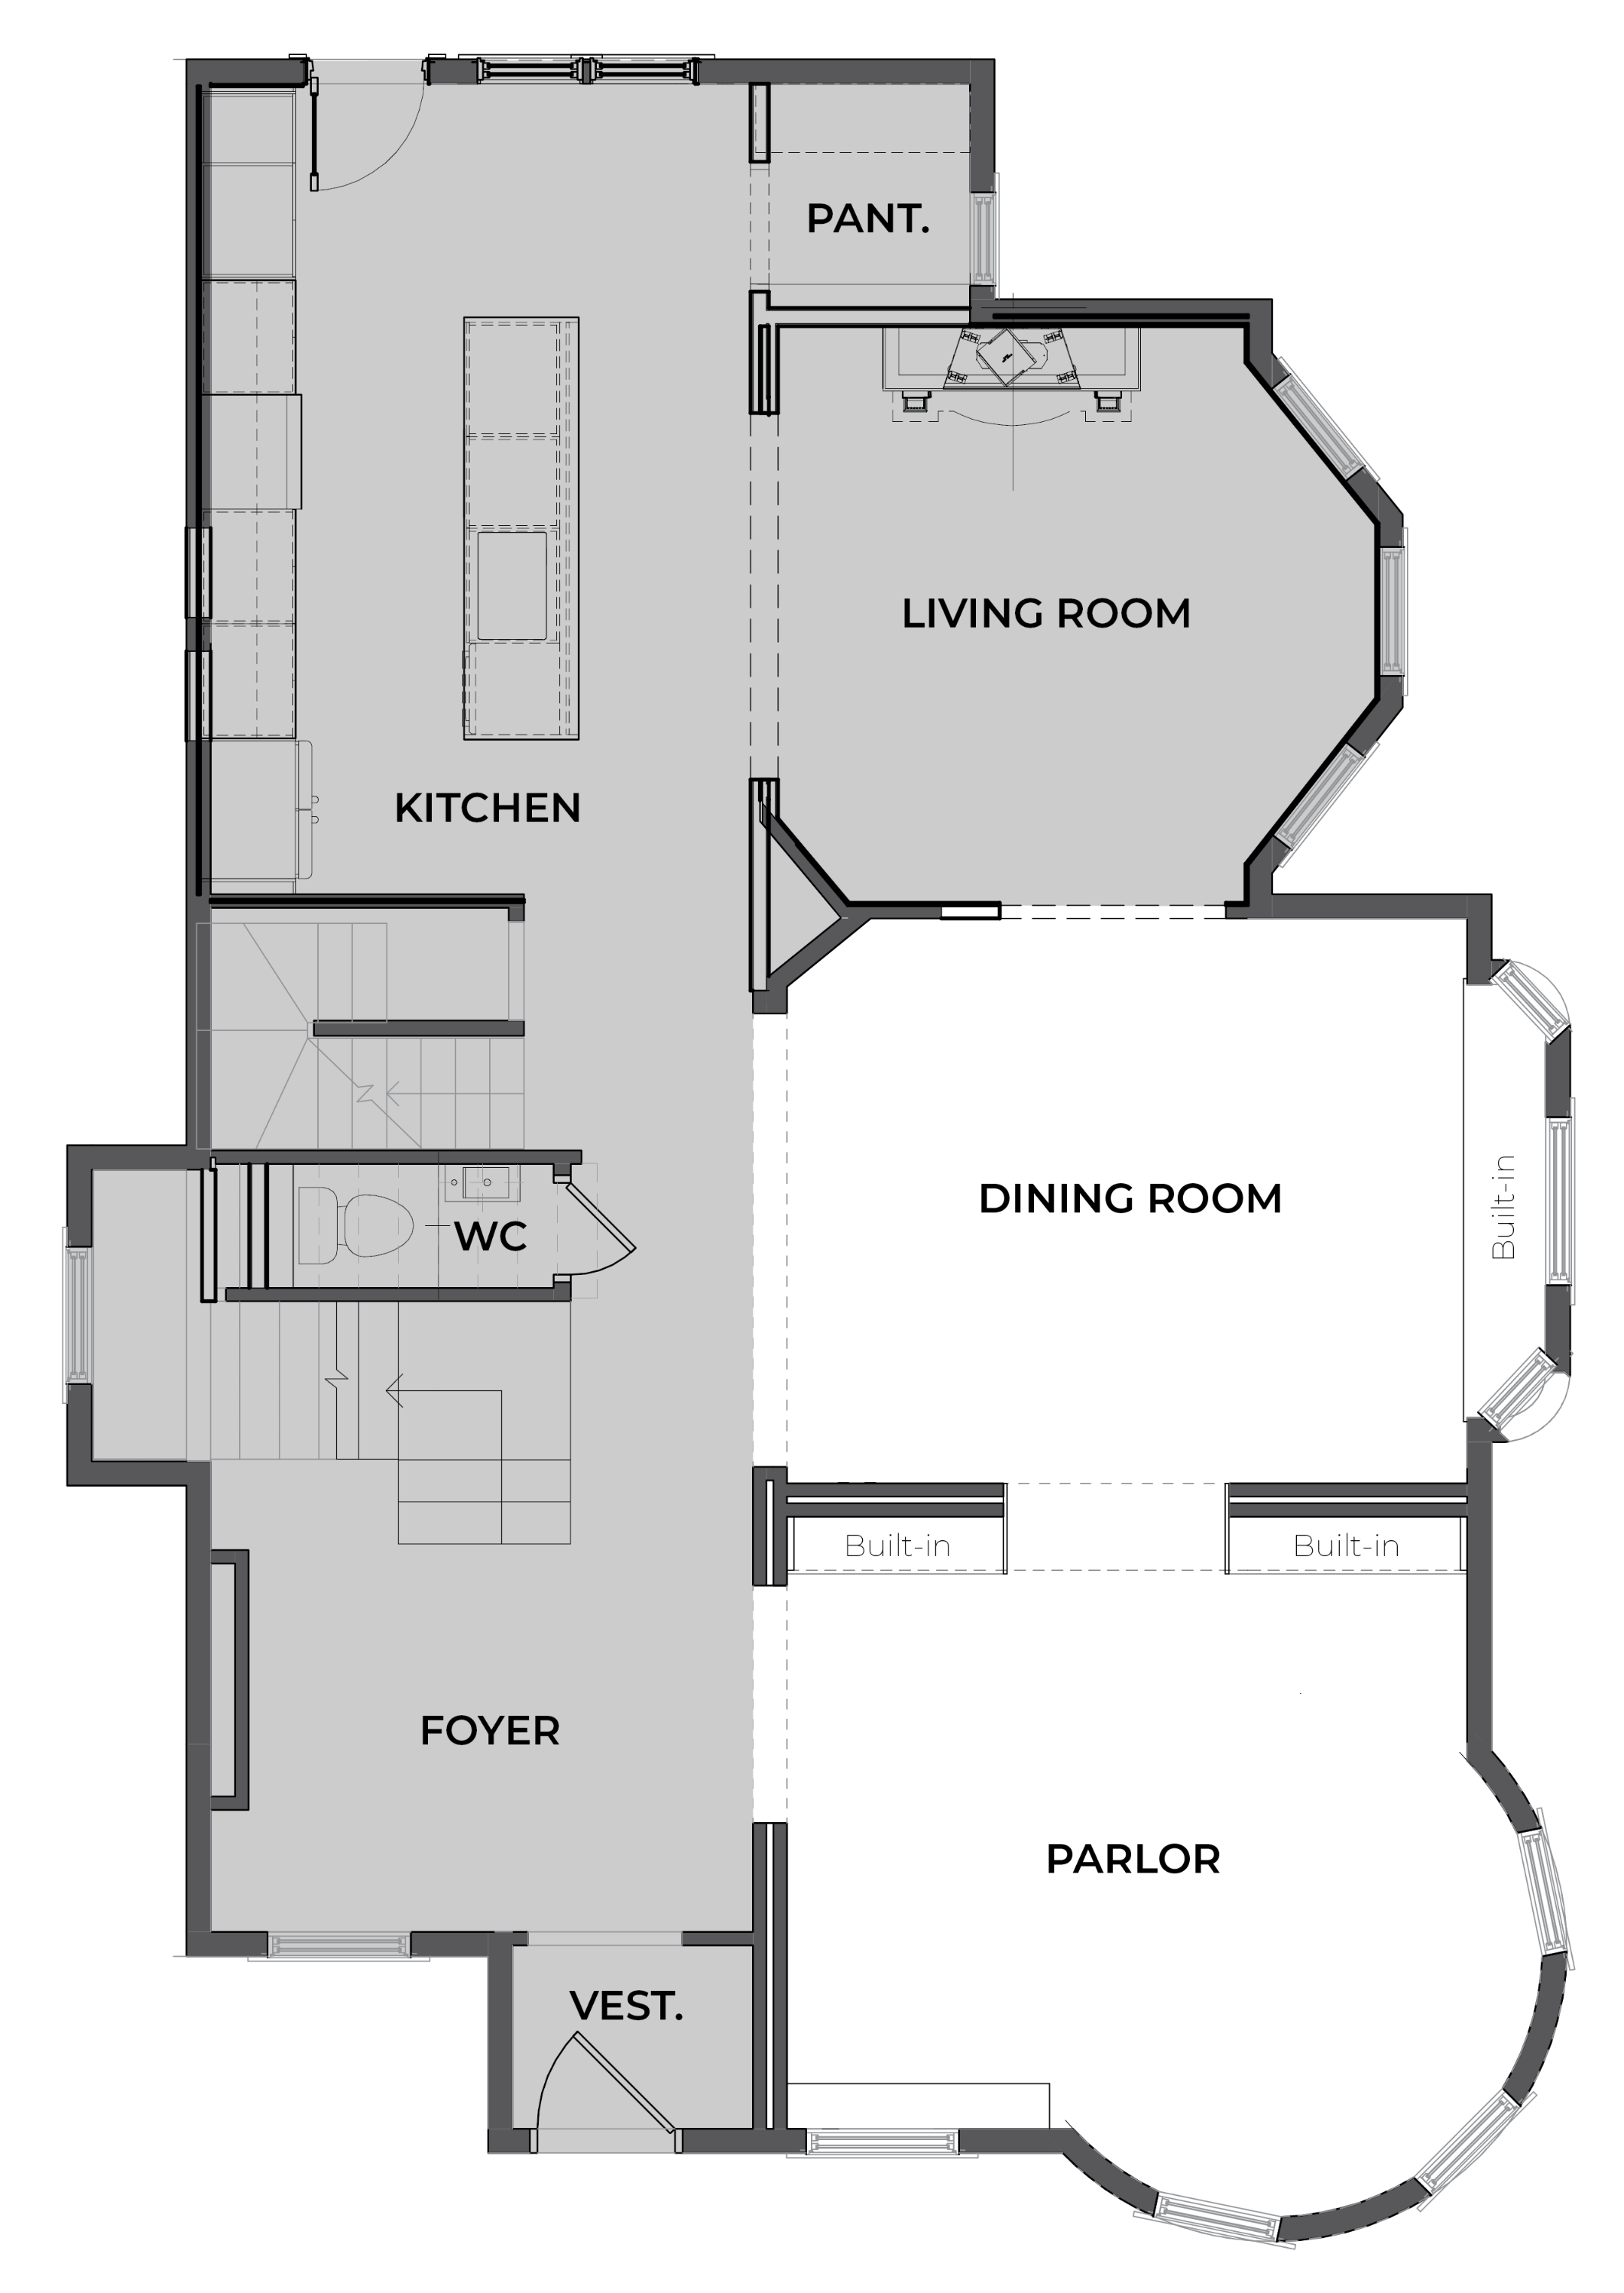
When you enter our home there are two large rooms and their current state has been wearing on us. BUT NOW IS THE TIME! Earlier this week announced on Instagram that these rooms would be our next project and that our deadline would be Christmas. We have a lot to get done by the end of this year when the holidays kick in so we're dubbing this:
THE 2020 SPRINT!
pew pew peeeewww *airhorns*
Update: I intended to make this one blog post about both rooms but it got...long. We’re going to do this in two parts! Starting with the Parlor!
The Parlor
In Victorian homes the Parlor was intended to be the space where you welcomed visitors and entertained. Scenes of gossip and sipping tea come to mind while a member of the house staff holds an ear to the large wood pocket doors. In-fact the Victorians loved doors, and following a long stretch of open concept floor plans, it seems like we are heading back in that direction. A change we would personally welcome. We intend to use our Parlor in this same exact fashion but instead of sipping tea we will be spilling it.
For casual living we use our living room in the back of the house which directly abuts the kitchen. Here is where we chill out, watch tv, and consume popcorn.
// Did You Know? We've found old obituaries of previous owners noting that the wake would take place in the home - it's likely it was held in the parlor, as was customary for the time.

PARLOR INSPIRATION
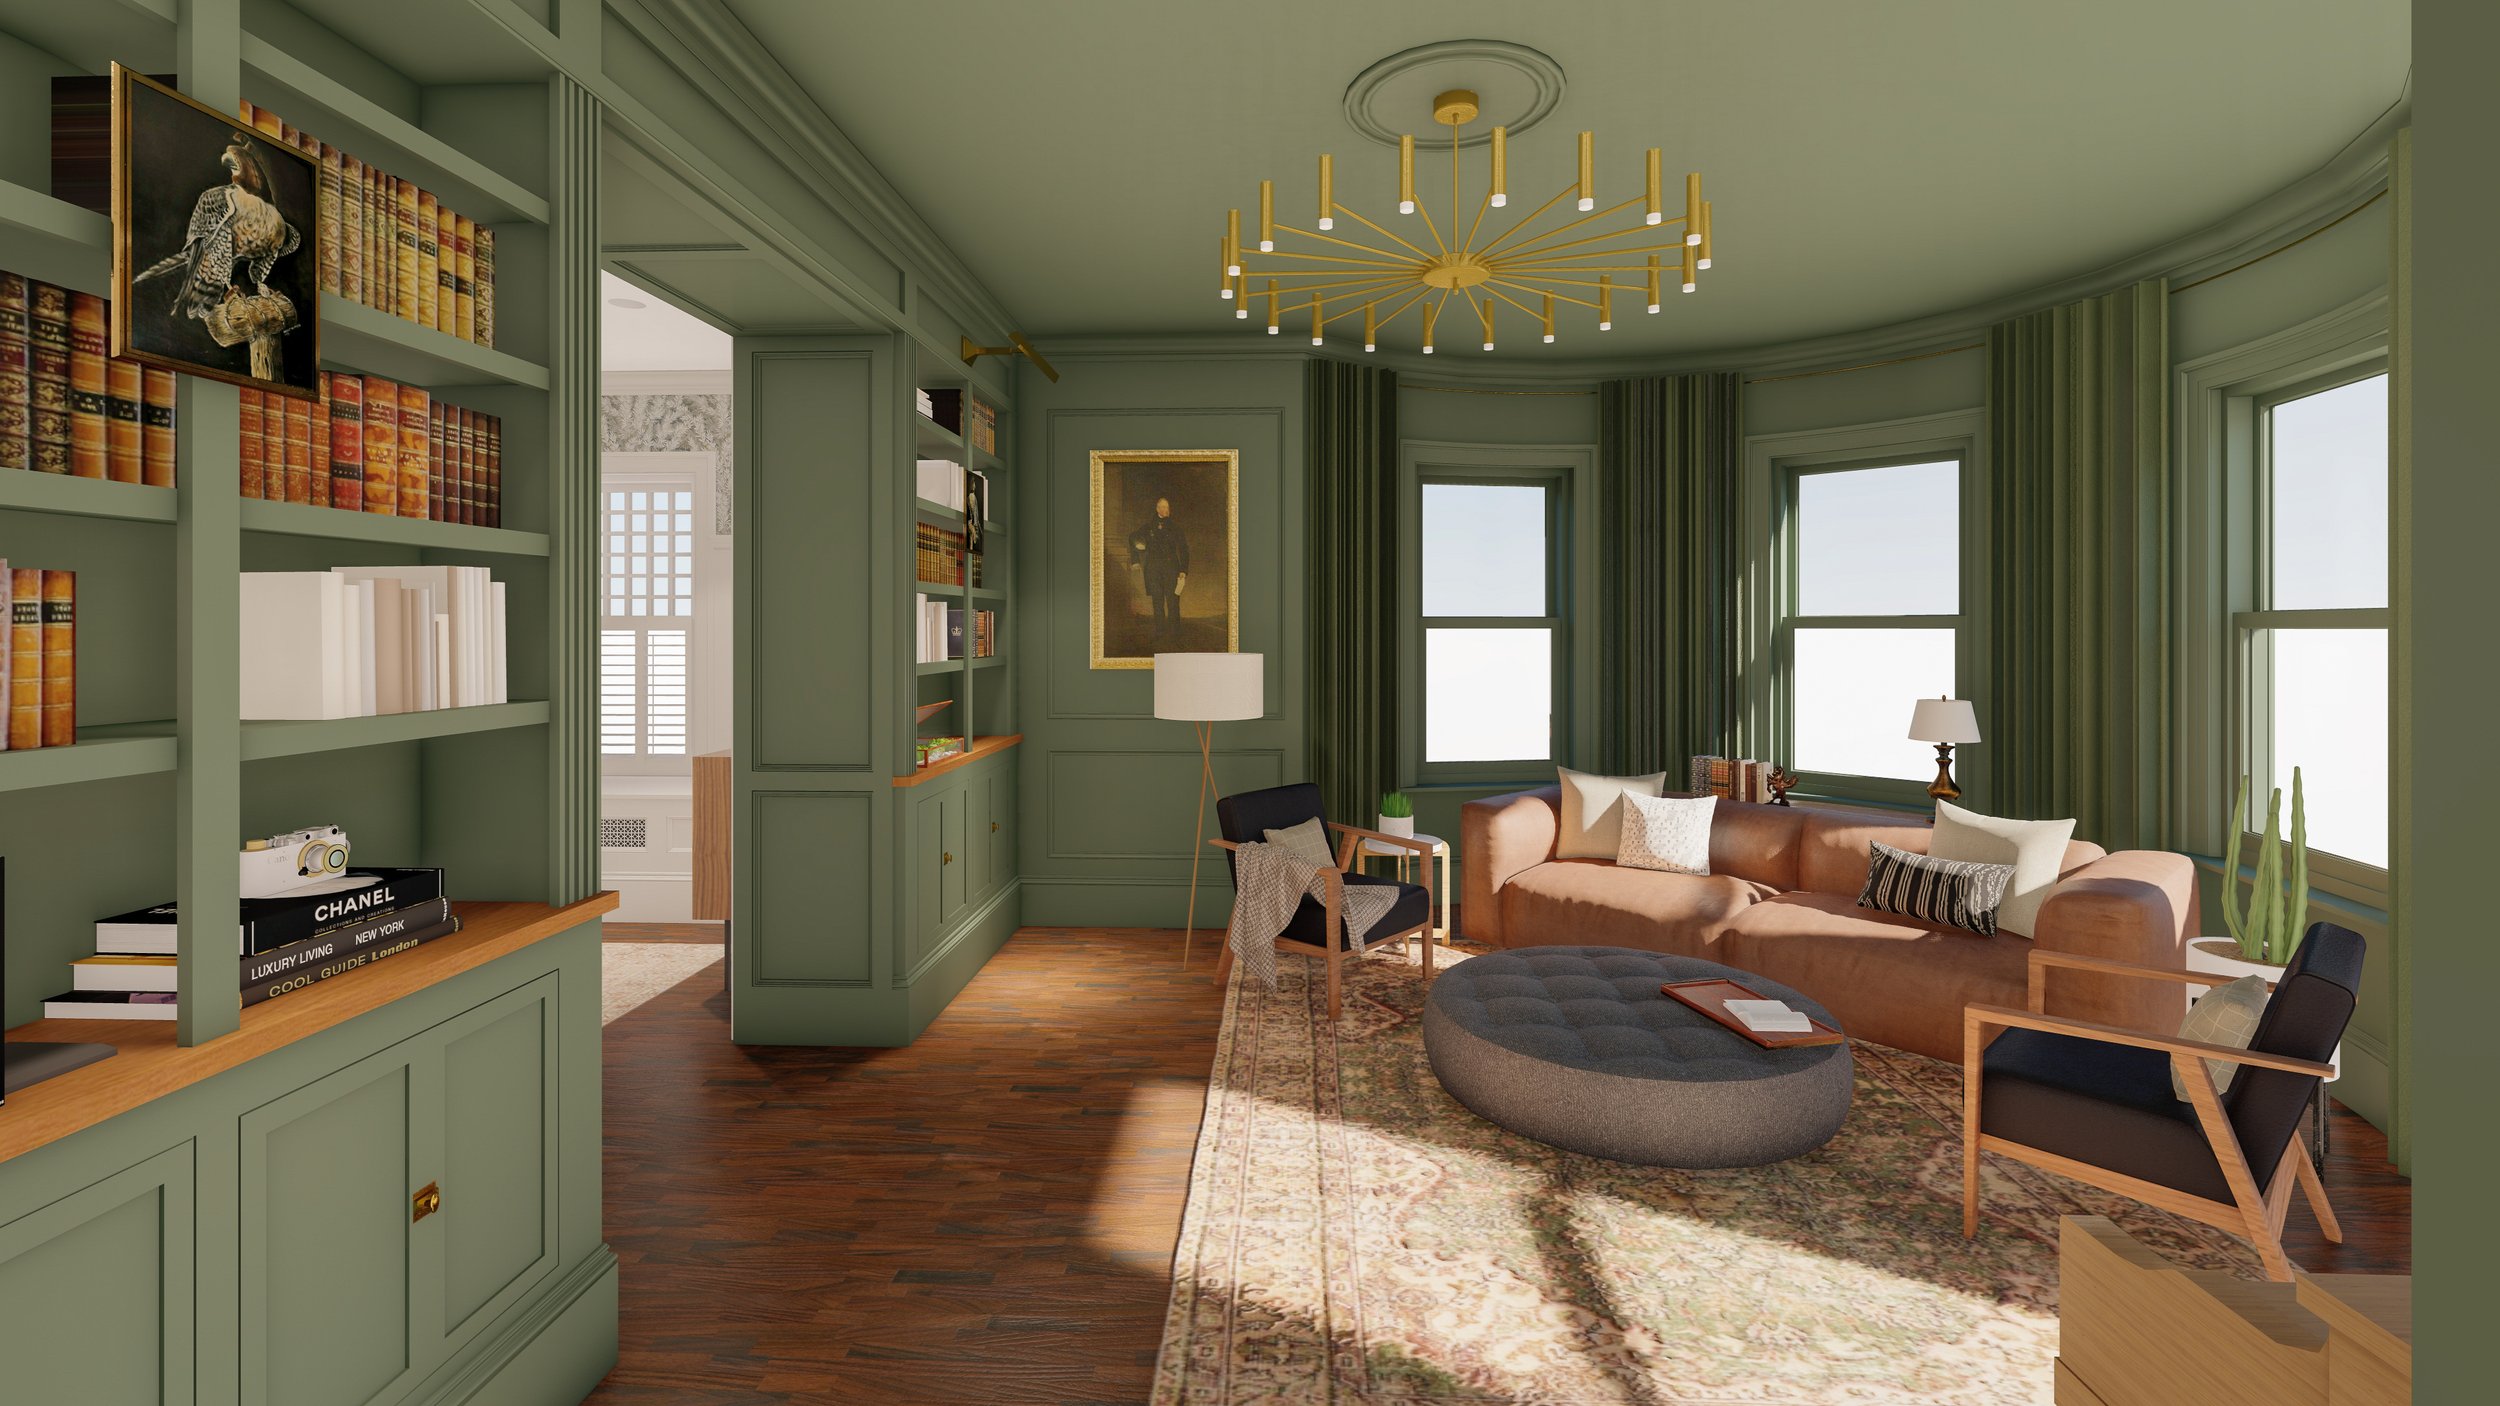
We’re going for a ~*handsome library vibe*~ that is more traditional in style. Here's a snippet from our Pinterest board to give you an idea:
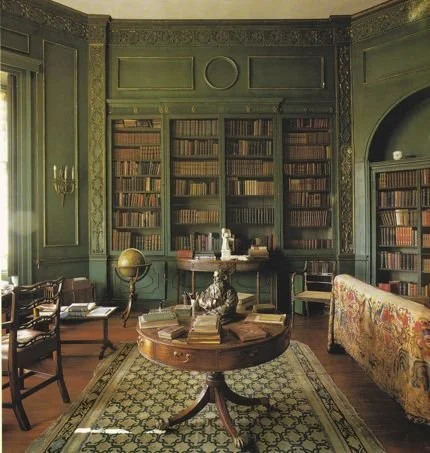

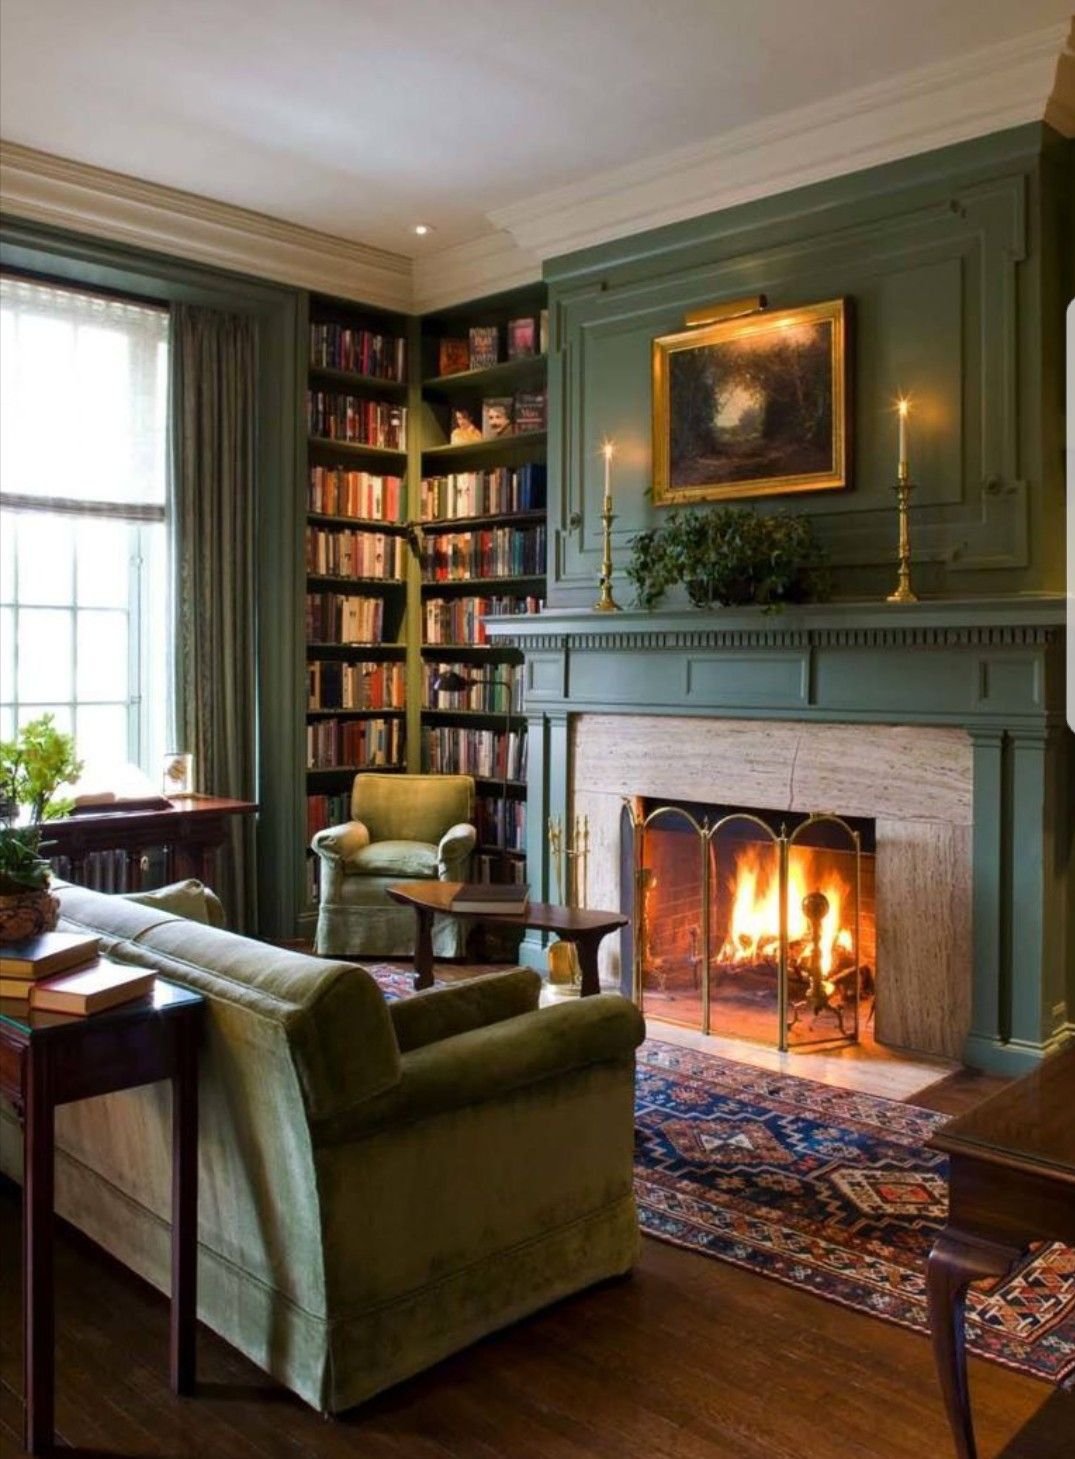

Very early on we painted the parlor Colonial Verdigris, a rich deep green, and we still love it. We intend to keep this color and extend it to the trim, built-ins, and possibly the ceiling. To create contrast we will change up the finish by keeping the walls flat (always flat) and the moulding semi-gloss. This is how we painted the Living Room and we love it. The semi-gloss really catches the light and causes the trim to pop off the walls.
Before
We have touched this room many, many times. We’ve had a couple false-starts as we’ve diverted our attention to other projects. So let's look back and see where we started.

Luckily this is not how the room looks today. Beyond, you know, electrical, floor refinishing, insulation, plaster, and painting we have managed to :
Refinish the existing baseboards
Install casing on one window
Repaired the ceiling (and roof) from water leaks
Had the built-in we designed fabricated and installed by our very talented friend, and neighbor @KenDeCost
Bought a piano (silly)


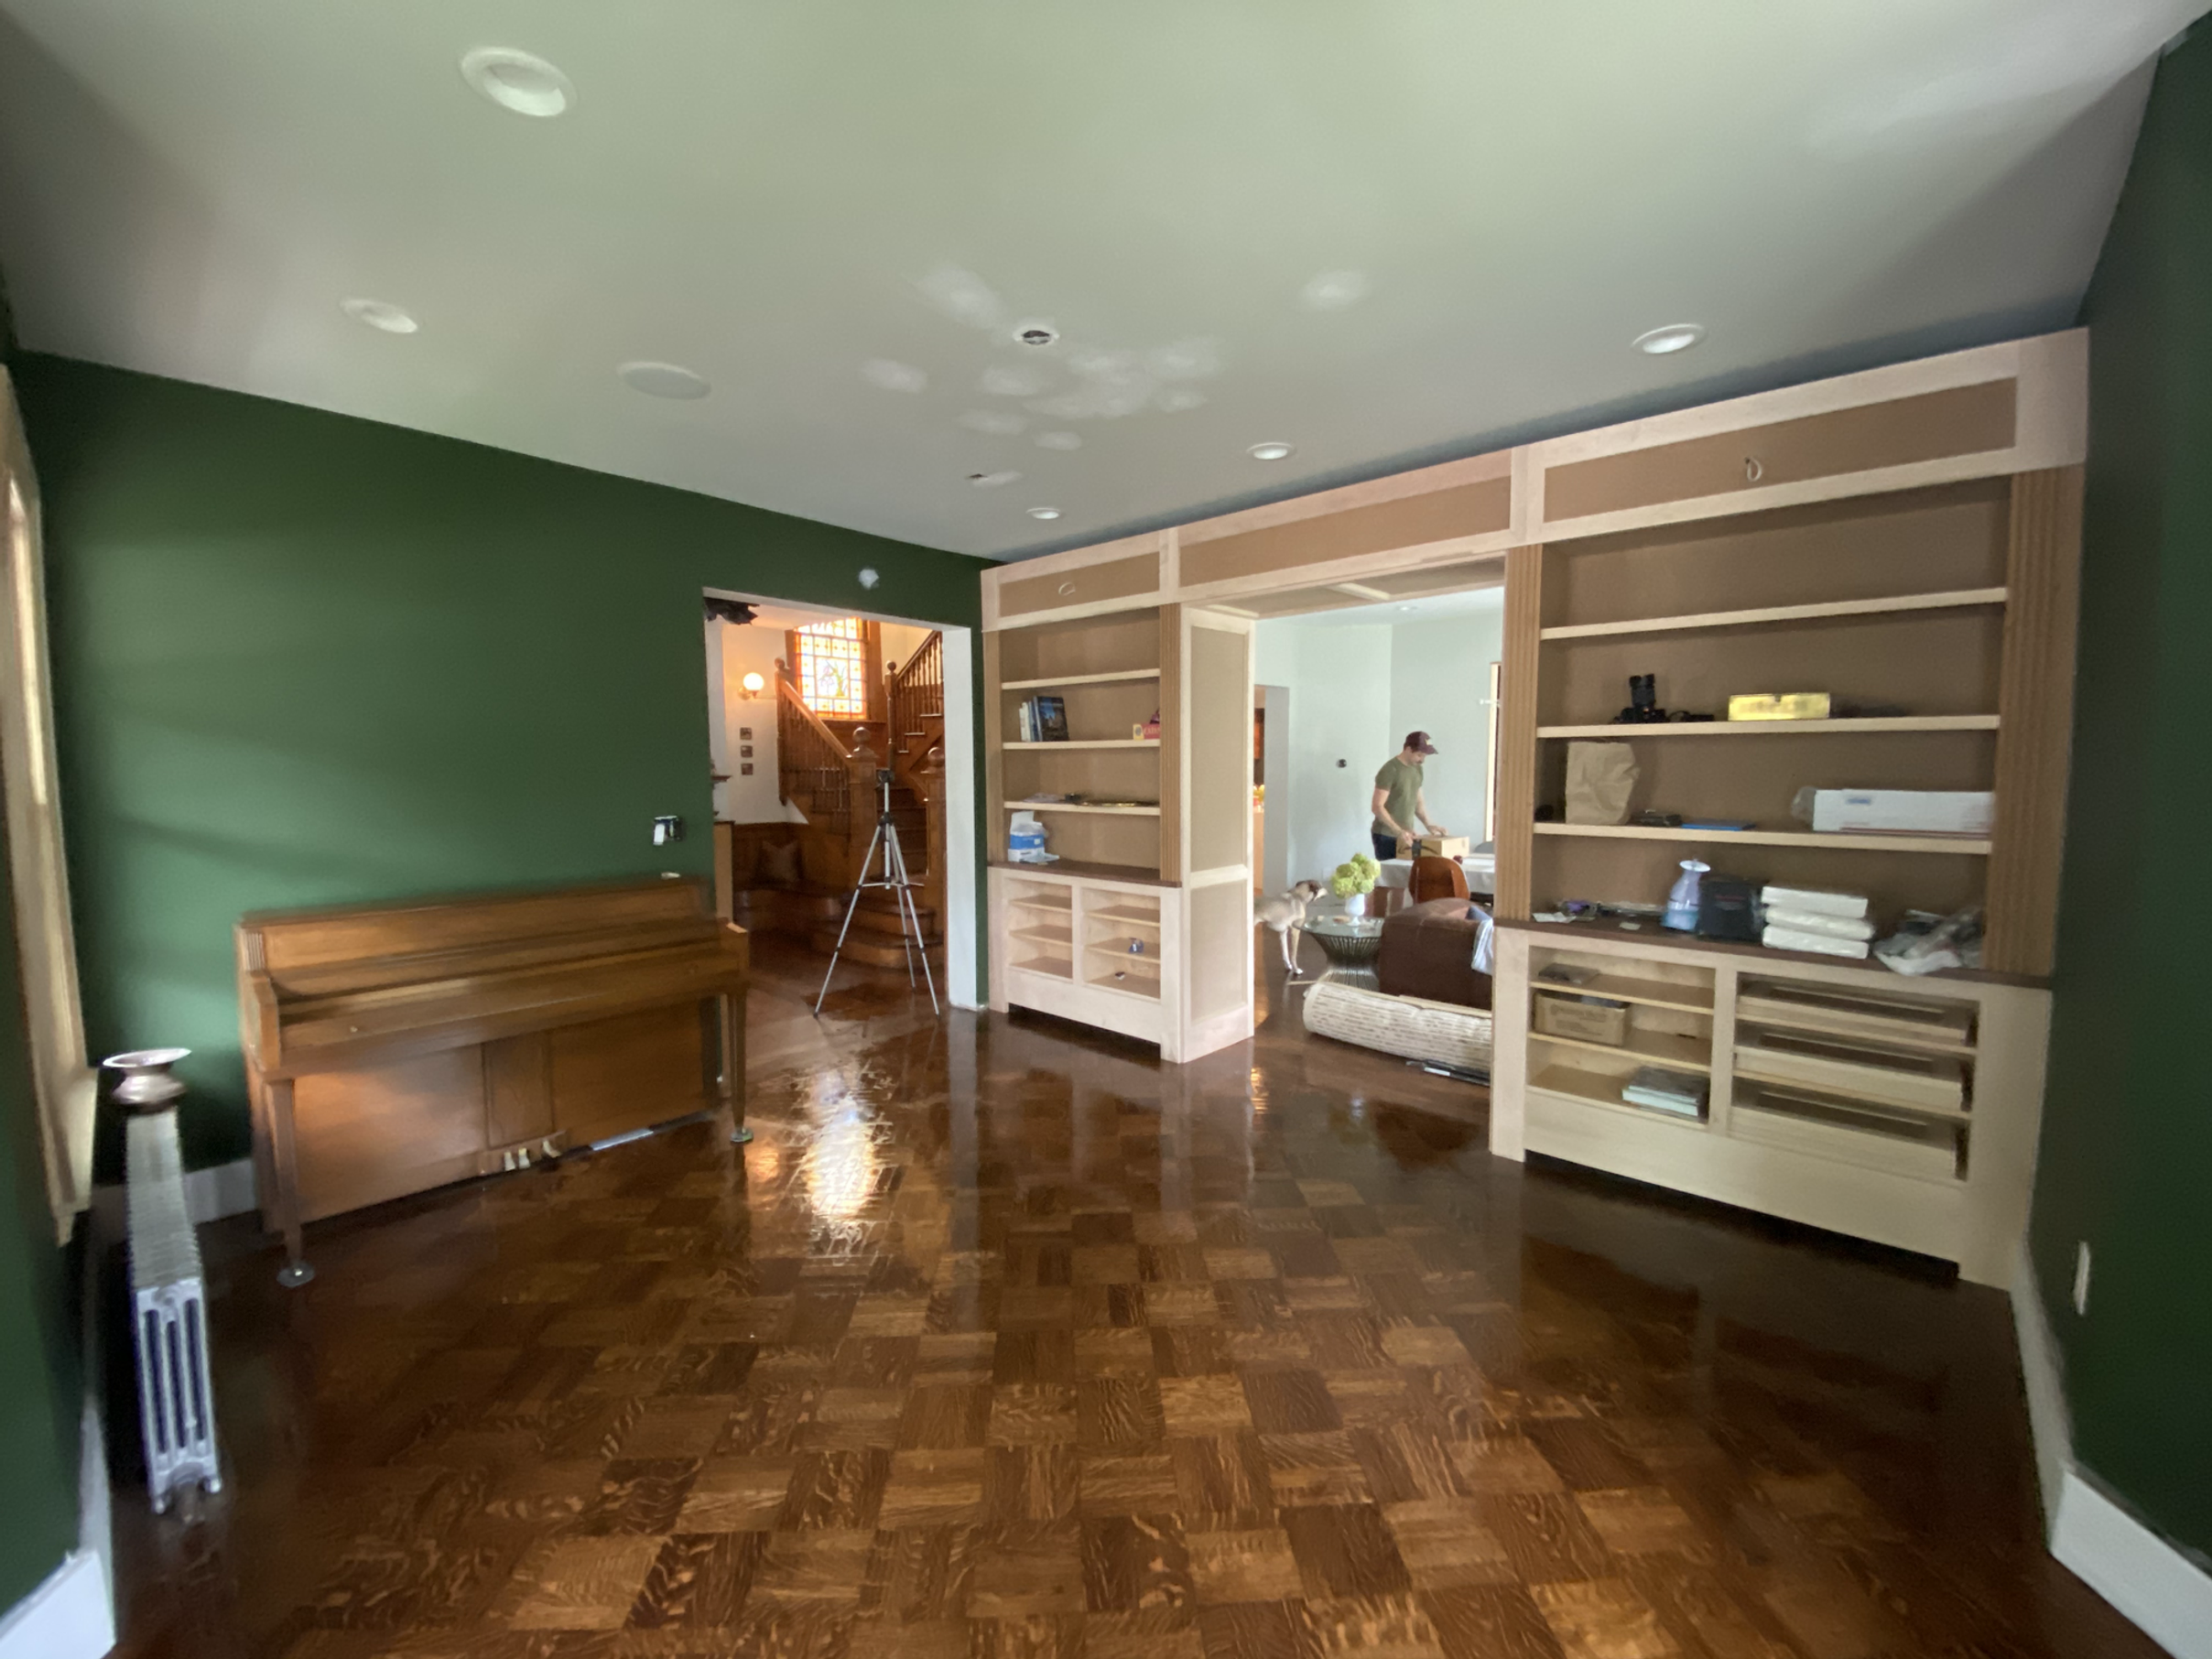
The built-ins are by far one of the most exciting parts of this project. Prior to their install the room was particularly challenging given its size and shape. Once the installation was complete it changed the scale of the room and felt very correct. It will serve as a focal point and a place to store all of our favorite things/junk mail. Bonus: it creates a wide portal to the dining room that feels very unique.
THE TO-DO LIST
// Millwork
Cased opening panels, door casings
Window casings (This is going to be super fun because they’re CURVED)
Tie the existing baseboard into the built-ins
Basecap (curved!)
Crown (CURVED!!!)
Chair-rail (...curved.)
Applied “picture frame” moulding (thankfully not curved)
// Paint
Sand, fill, sand, caulk all millwork
Prime
Paint Millwork Semigloss (a combination of spray and brush)
Paint Walls Flat
Paint Ceiling green?! ( We’ve done back and forth on this a million times)
// Furnishing & Decor
We have a few items for this room but we are still on the look out for so much!
Vintage Rug
Accent chairs
Coffee table
Lamps & light fixtures - standing and otherwise
Side tables
Pillows & throws
Art, art, art!
Renderings
Now for the content you’ve likely scrolled past the above to see! We are constantly iterating our design through modeling and rendering. We use these as our “mood-board” and to visualize how everything will look. Modeling is a great way to mock-up moulding concepts, built-ins, color, and furniture layout.
Stephen uses SketchUp for modeling ( SketchUp has a Free version!) and Lumion to render these views.

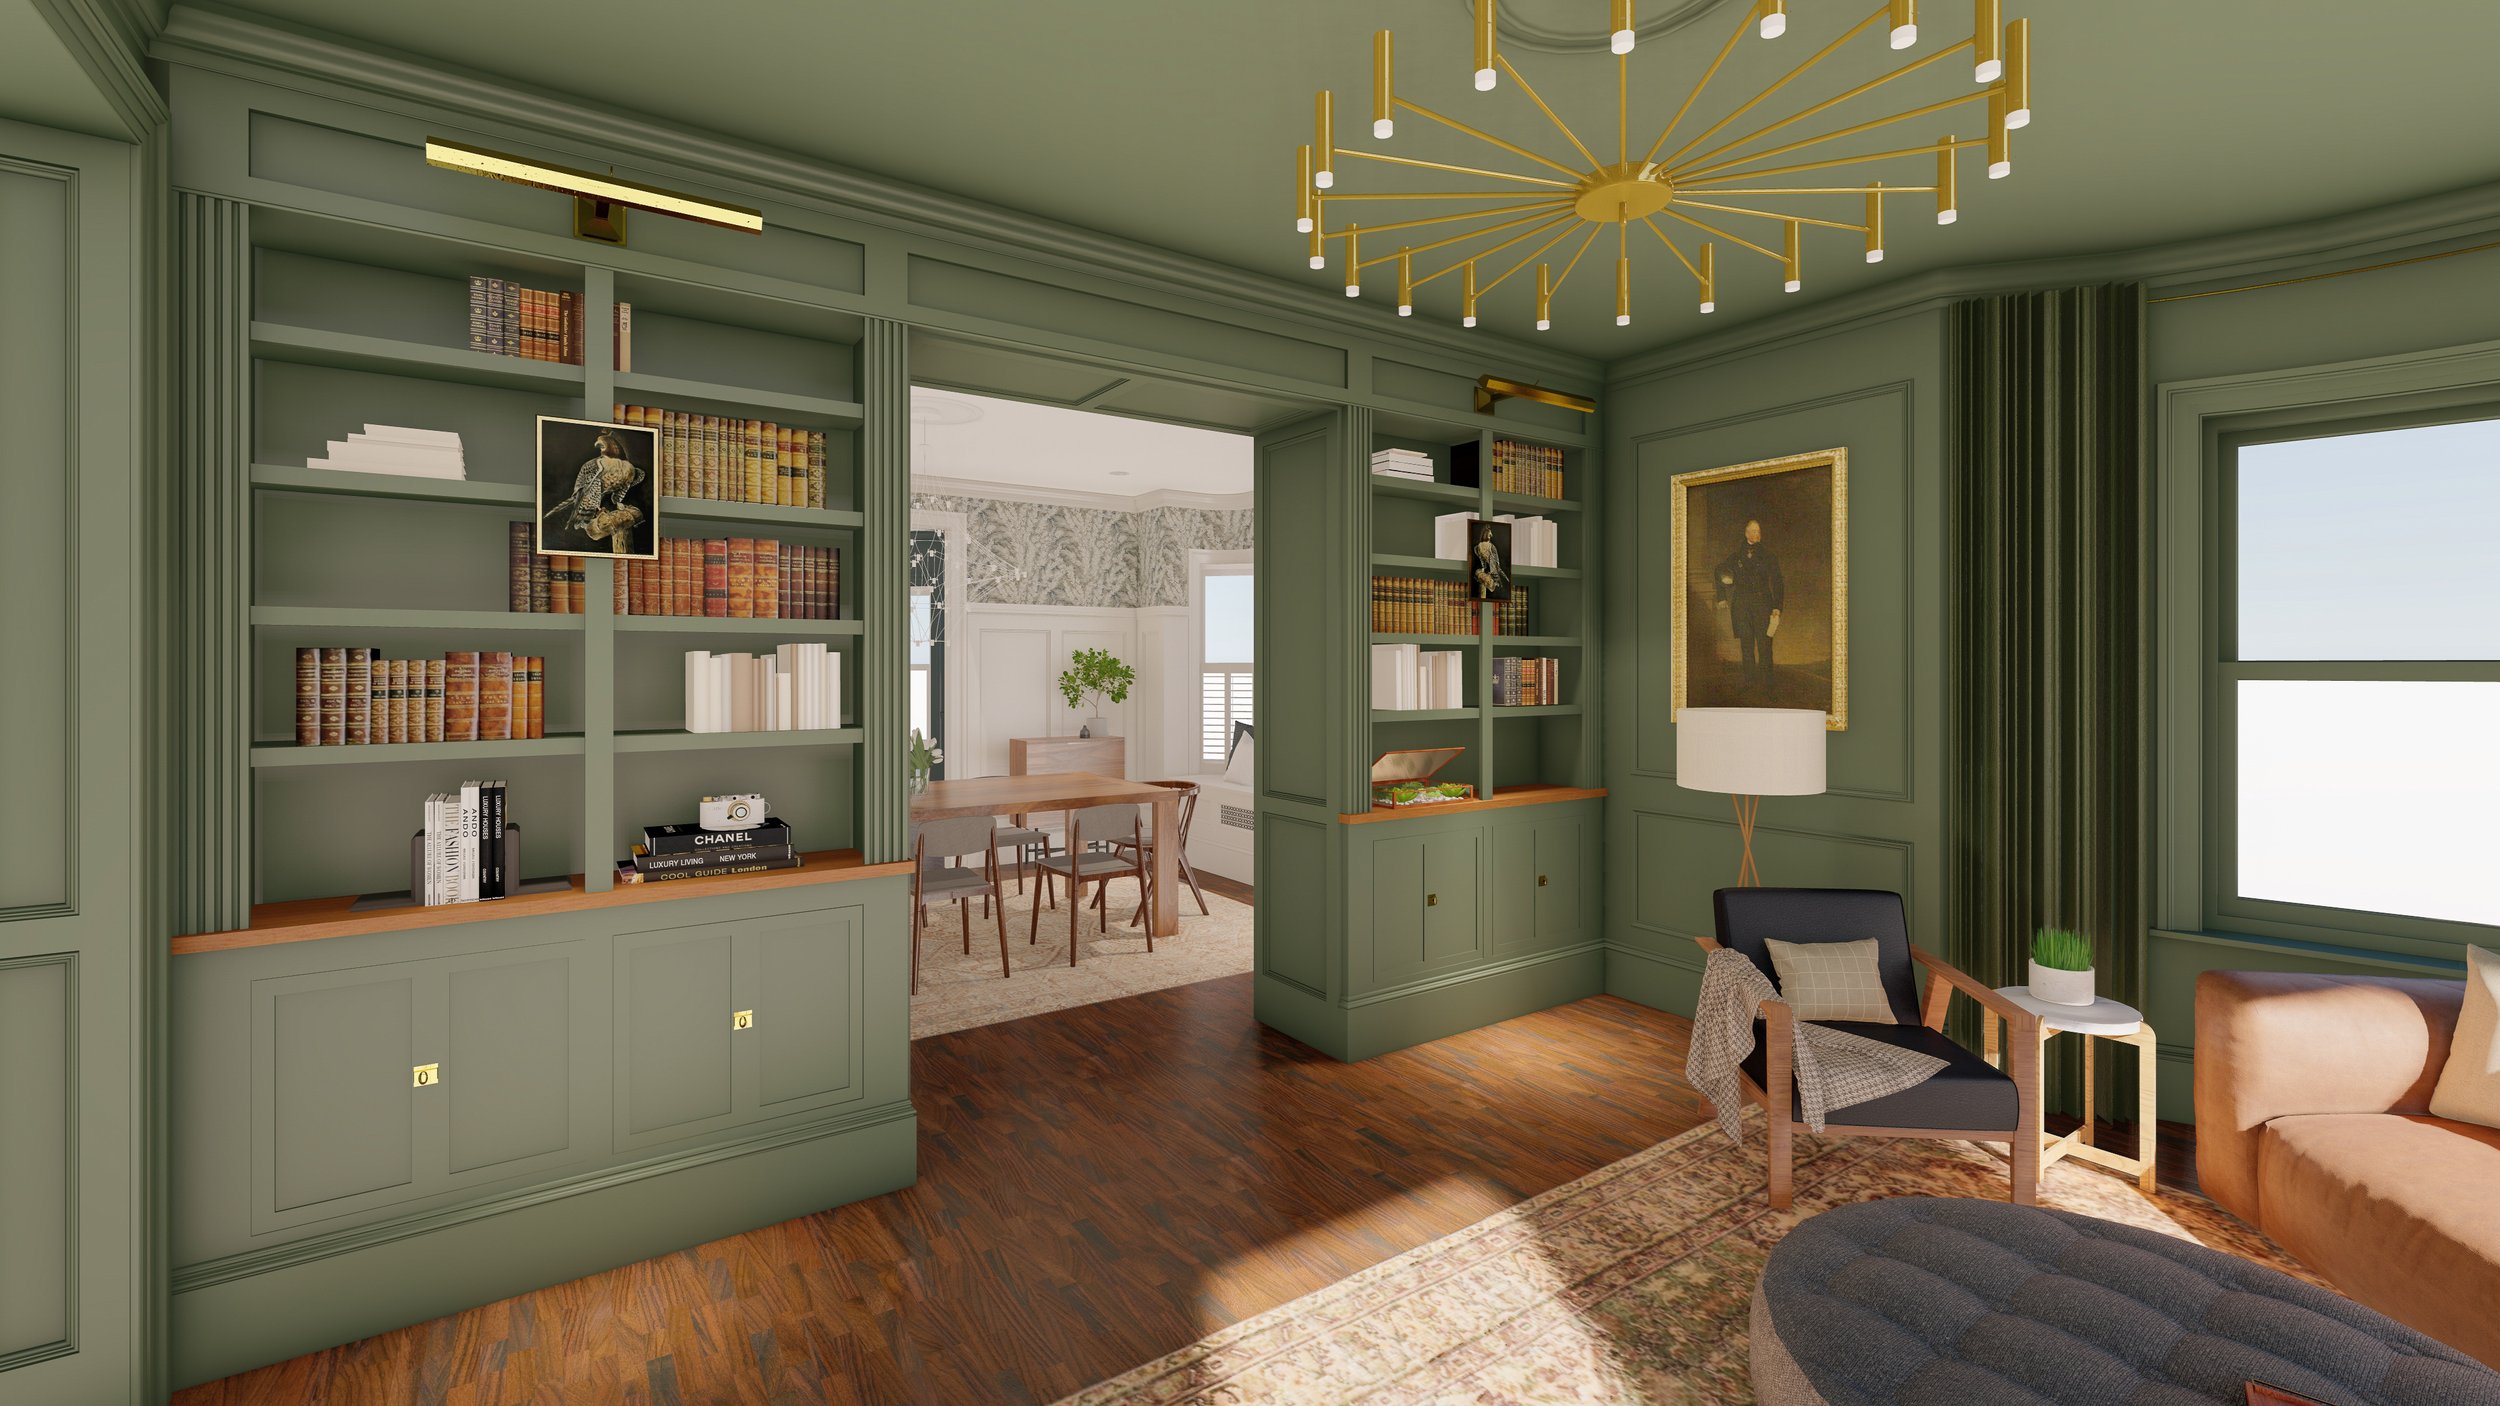


And Look! You can just barely see the future dinging room peeking through the built-in. Stay tuned for the next blog post all about our dinging room design! Let us know your thoughts in the comments below or DM us on Instagram!