
Our Content Tech And Tools
We get A LOT of questions about how we create our content… ranging from our process to the rendering software we use… and everything in-between. What we don’t get to do often is talk about it, and we LOVE to talk about it, so here we go!
// Remember: The best camera is the one you have in your pocket. As you read through our Tech & Tools List do not forget that you do not need all of these things to create beautiful content.

Photo & Video Overview
// Photography
We shoot all of our photography on either an SLR camera or an iPhone. We try our best to use the SLR whenever possible because it simply produces a better photo. While the iPhone can take a great shot it cannot compete with an SLR and a big lens.
// Video
We shoot all of our Instagram Stories and almost all of our video (Instagram Reels/TikTok) on an iPhone.
Preferred iPhone Camera Settings:
Record Video > 4K at 30 fps (please stop shooting at 60 fps, Stephen will throw up)
Record Video > HDR Video set to OFF
Grid set to On
Preserve Settings > Exposure Adjustment set to ON
Preserve Settings > Creative Controls set to ON
We went through a brief period where we started shooting more video on an SLR but we found it to be too “unreliable” for the type of content we create. The video would too often be out of focus, the lens would “breath” when trying to maintain focus, the file sizes were huge, and the camera battery died fast. For all of these reasons we converted back to iPhone due to “reliability” and ease of-use. We still occasionally use the SLR for video but only in the most controlled environments when we want the highest quality.
// Content Management
We manage all of our photos and video on a dedicated iPad. All of our photos and videos are added to the default Apple Photos app via SD Card Reader or AirDrop and then sorted into albums. Diligently sorting content into albums is a tedious task but getting into the habit has made our lives significantly easier.
If you are a solo creator, doing all of this on your iPhone exclusively would be more than sufficient.
Equipment
// Cameras
iPhone 13 Pro
Used for Instagram Stories, Instagram Reels, Time-lapses, some PhotographySony a7R II
Used for all Photography and occasional Video - we have used this camera for years and we love it. If we start creating more SLR Video we would likely upgrade to the Sony Alpha better optimized for video - TBD.
// Camera Lenses
The lens is one of the most expensive pieces of equipment but are arguably more important than the camera body itself - the lens makes the photo. We have grown our collection over time but started by doing short term lens rentals to get to know the lens prior to making the investment.
You will find that most of our lenses are “Prime” which means that they have a fixed focal length. You will see 50mm, 85mm, and 24mm for example - as opposed to our single 16-35mm zoom lens. The advantage of a Prime lens is that they allow for a lower aperture and perform better in low light - with a more shallow depth of field.
We are also big fans of Sigma lenses. These are made for most camera types as long as you purchase the lens with the correct mount (our camera is the Sony E Mount for example). These lenses are often more affordable than their Sony counterparts and often outperform them (in our opinion).
Sigma 50mm F1.4 Art (for Sony E Mount)
This is our go-to lens for general use because of its versatility for portraiture, product, and landscape photography. The f1.4 aperture allows for a very shallow depth of field and works great in low light.


Sigma 85mm F1.4 (for Sony E Mount)
Similar to the 50mm this lens has a longer focal length allowing you to shoot from further away and decrease lens distortion while maintaining detail. We use this lens for product and detail shots.

Sigma 85mm - Distance

Sigma 85mm - Product
Sony G Master 24mm F1.4
Primarily used to shoot interiors, the fixed lens allows for low light, with a wide angle, and without a lot of lens distortion (you don’t get as much of a “fish eye”).Note: Sony has a line of lens called Sony G Masters - they utilize E mounts, which is what works with our camera. So, don’t be worried if your lens says Sony E, rather than Sony G.

Sony G Master 24mm - Interiors
Sony G Master 16-35mm F2.8
This lens provides a more extreme wide angle in the 16mm range which we use in tight spaces that can be more difficult to photograph. The versatility makes it a great option for adventure photography.

Sony G Master 16-35mm - Wide angle

Sony G Master 16-35mm - Tight space

Sony G Master 16-35mm - Tight space
// Computers
iPad Pro 11” 3rd Gen
We use this to consolidate content from our iPhones and SLR camera in addition to Photo and Video editingMacbook Air
M2 with 24GB Ram
We use this for Designing, Photo editing, 3D Modeling, Rendering, and Business tasks
// Camera Accessories
Camera Strap : Stephens Favorite
Tripod: Our favorite “on the go” option when using an iPhone (no need to use a phone clamp, a magnetic one is included)
Tripod : Used exclusively for our Sony Alpha
Editing
// Photo Editing
Adobe Lightroom CC (iOS & Mac)
While all photos are kept in the Apple Photo app some photos (which we call “selects”) are brought into Lightroom for further editing. Here they are also organized into folders prior to editing. Photos are then exported at different aspect ratios depending on their intended use.Adobe Photoshop (iOS & Mac)
Occasionally images will need additional editing and this is done in Photoshop.
// Video Editing
Videoleap (iOS)
Almost all video editing is done in Videoleap on iPhone or iPad. We find that it is the most capable iOS editing app and performs all of the functions we need. We do not edit video on desktop.VSCO App (iOS)
This app is used for video color grading and correction.Cut Story
Because we film Instagram Stories in our native camera app (not in Instagram) we use this app to cut longer video into shorter segments for posting.
Design & Rendering
// Graphics
Canva Pro (iOS & Mac)
We have been using Canva for the last year and find it to be immensely useful for everyday tasks. With the available templates you can create almost anything and the background removal tool is a game changer. This has basically eliminated our use of IllustratorAdobe Illustrator
Used on occasion for vector based design work that requires high precision and detailing.
// Modeling
SketchUp Pro (Mac)
This is very versatile modeling tool with a free version and ample resources for learning and creating. The learning curve may initially be steep but it’s well worth the time to learn. We mockup all of our spaces in SketchUp from the very start of any project.

SketchUp Pro - 3rd Floor Office View
Revit (PC Only)
This is the industry standard for architectural BIM (building information modeling). We used to use Revit frequently - best for floor plans and documentation.
// Rendering
Enscape (Mac)
Our newest tool on the list we use Enscape for rendering our spaces. This is the process of taking a SketchUp Model and making them look photorealistic by applying textures and light to the image. We previously used Lumion but migrated due to cost and because its PC only.
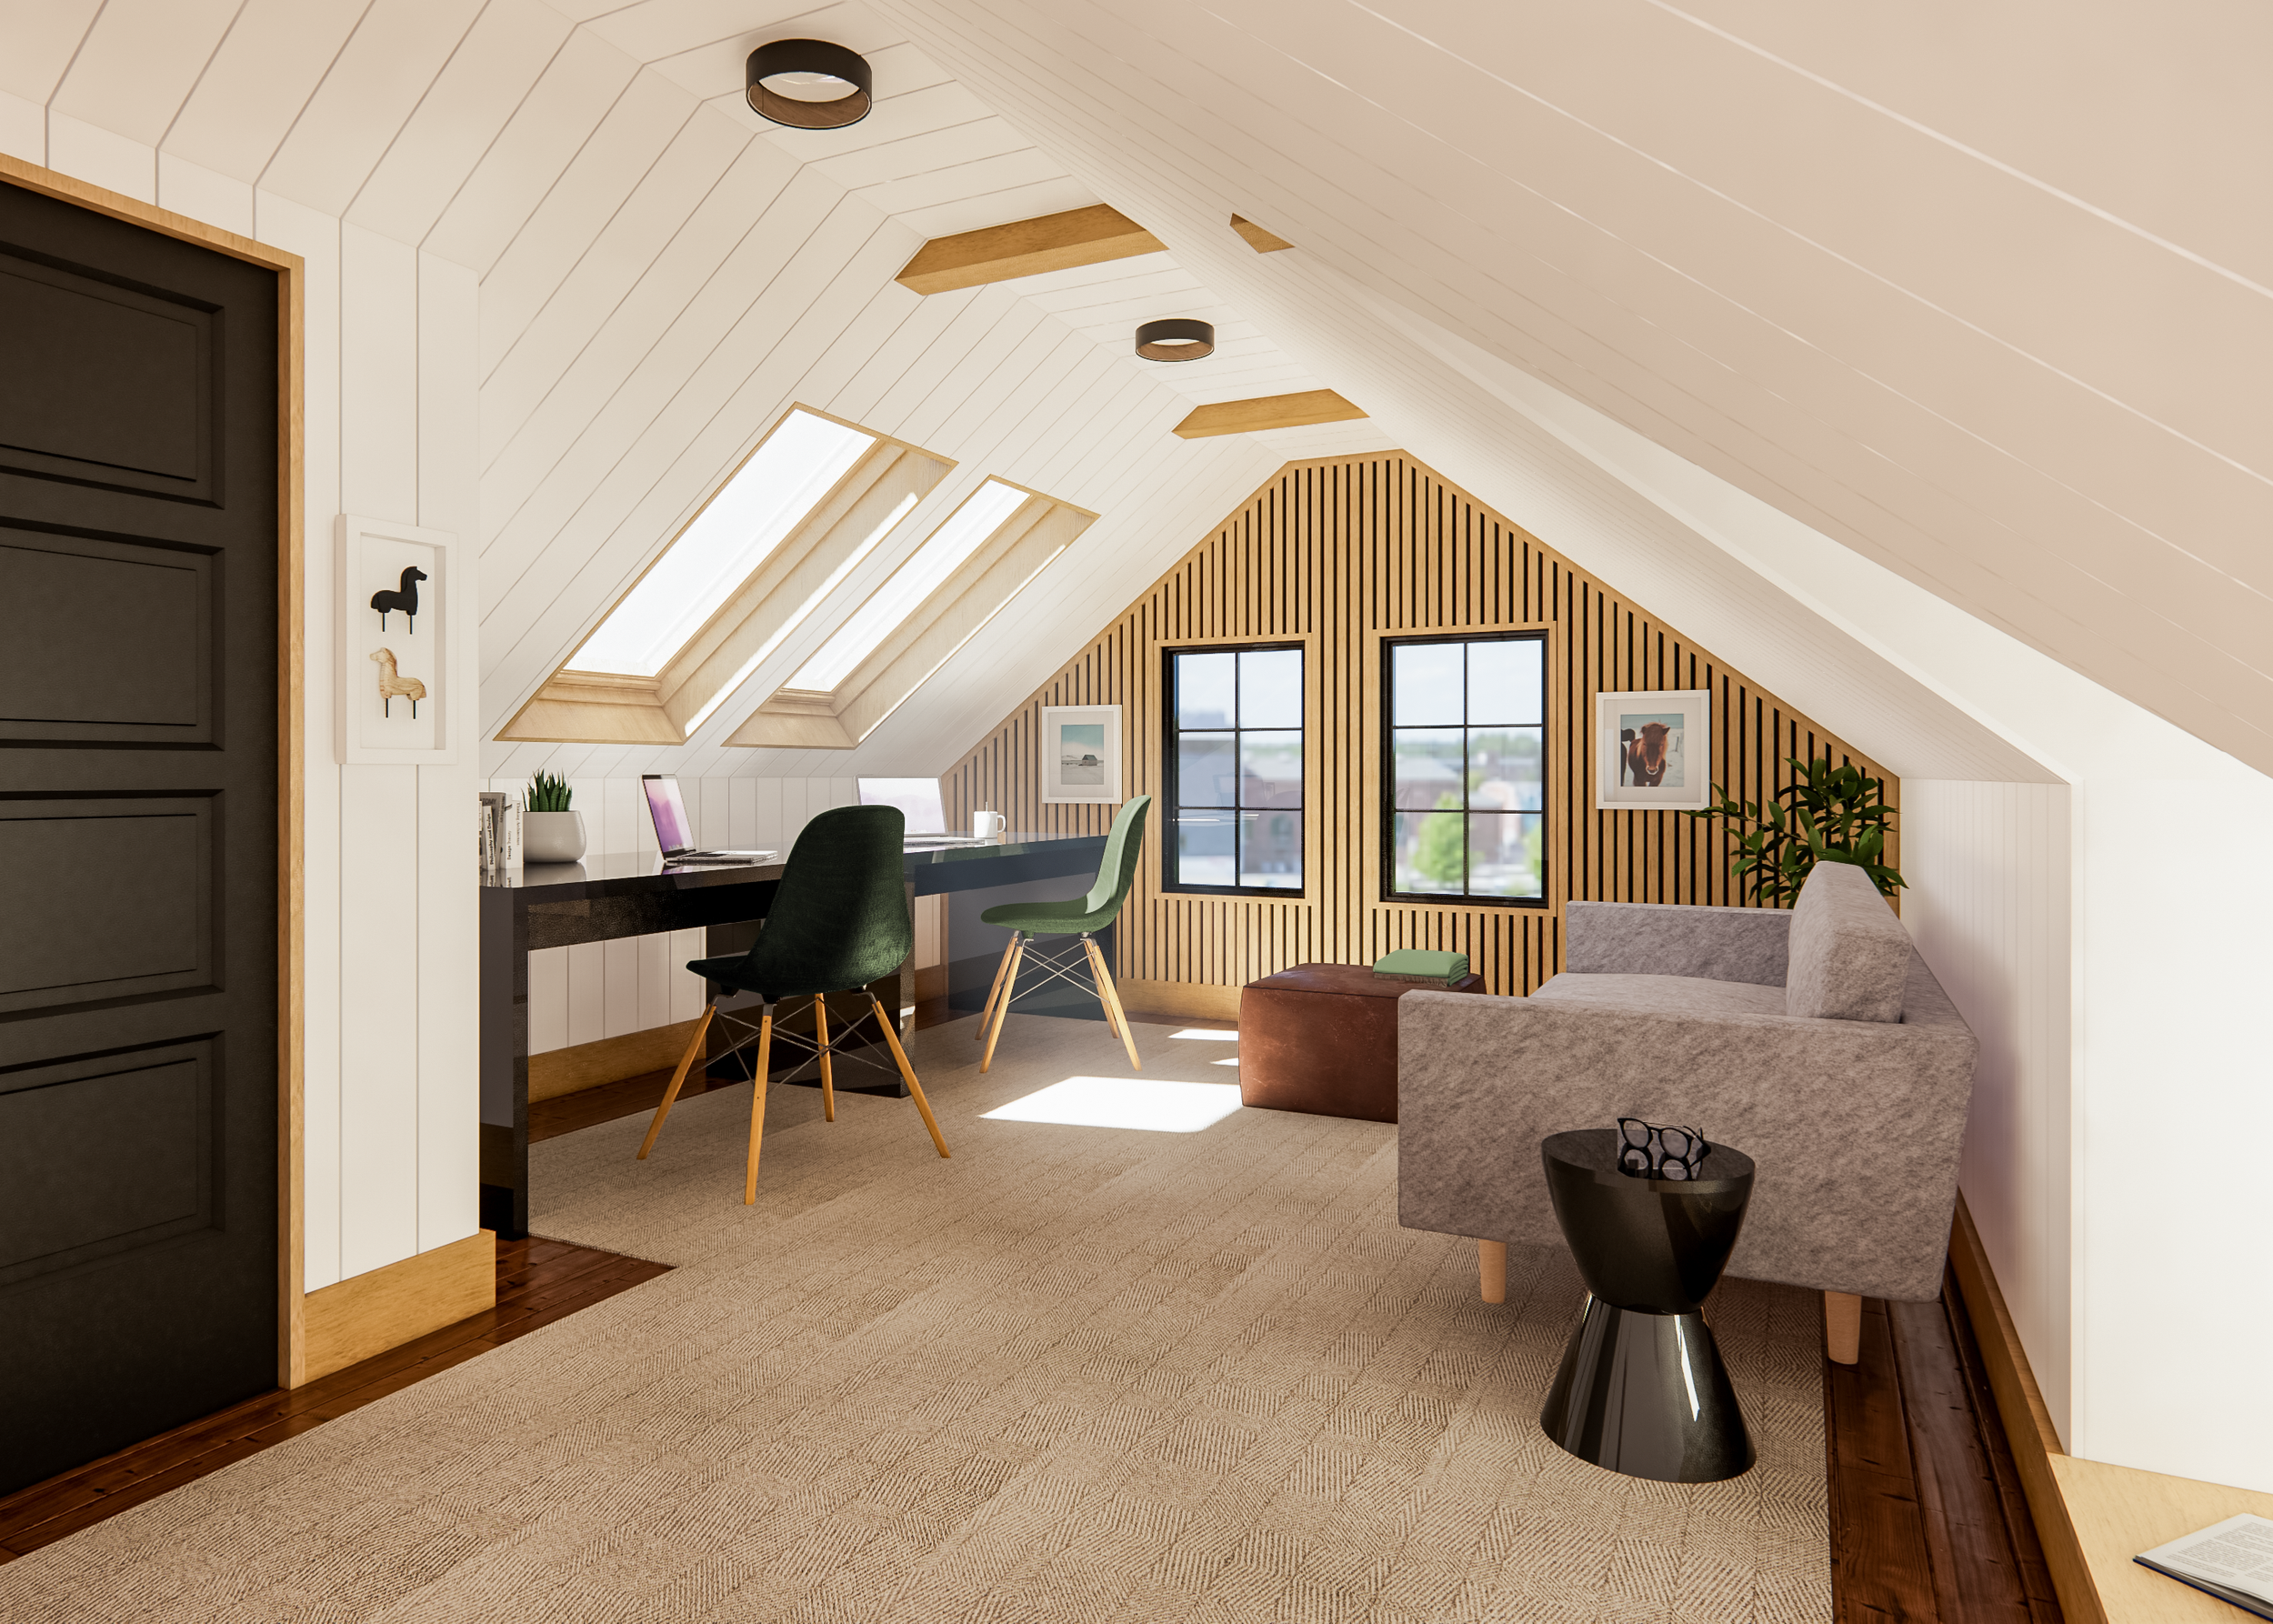
Enscape - 3rd Floor Office View Rendered from SketchUp
Final Thoughts
At the end of the day creating content should be fun. Don’t worry too much about having the very best equipment or being the very best photo editor.
Just keep creating what you love.