
An Affordable Kitchen
While renovating our kitchen (and creating kitchen content) it was not lost on us that, for many, our kitchen renovation is not financially feasible. Budgets, almost by definition, are different for everyone and the “kitchen budget” is unlike any other. An expensive $20k renovation for one person may be less than the cost of the refrigerator for the next.
Our kitchen cost us around $80k retail - excluding our endless labor - and we feel that given the end result this was a very reasonable price. We have heard stories of kitchen cabinets costing double our entire budget - and to us that sounds bananas - but that’s the funny thing about budgets!
The Task at Hand
In reality, we paid less than $80k because we have the privilege of working with brands. So we wanted to challenge ourselves and re-design our entire kitchen - from the ground up - to achieve the same look and feel but at a fraction of the cost. For this exercise we are focusing on the main kitchen wall and the island. We are excluding the radiator box and pantry. Lets see how it goes!
We then took it a step further and Stephen rendered our new, more affordable kitchen, so that you could see the differences for yourself!
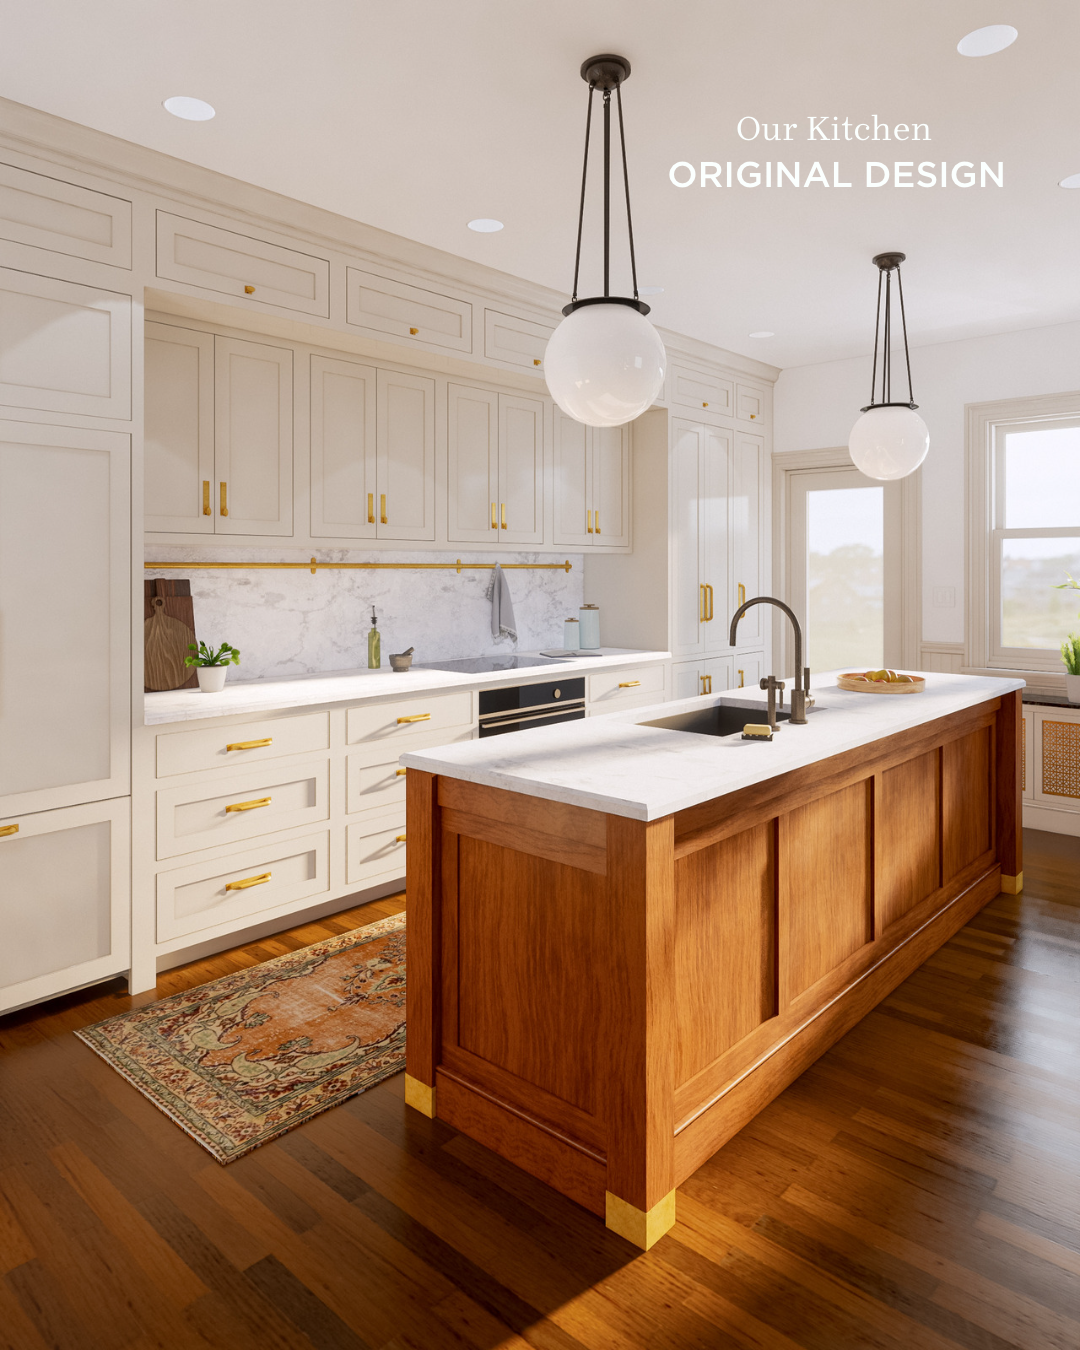
Our Original Design
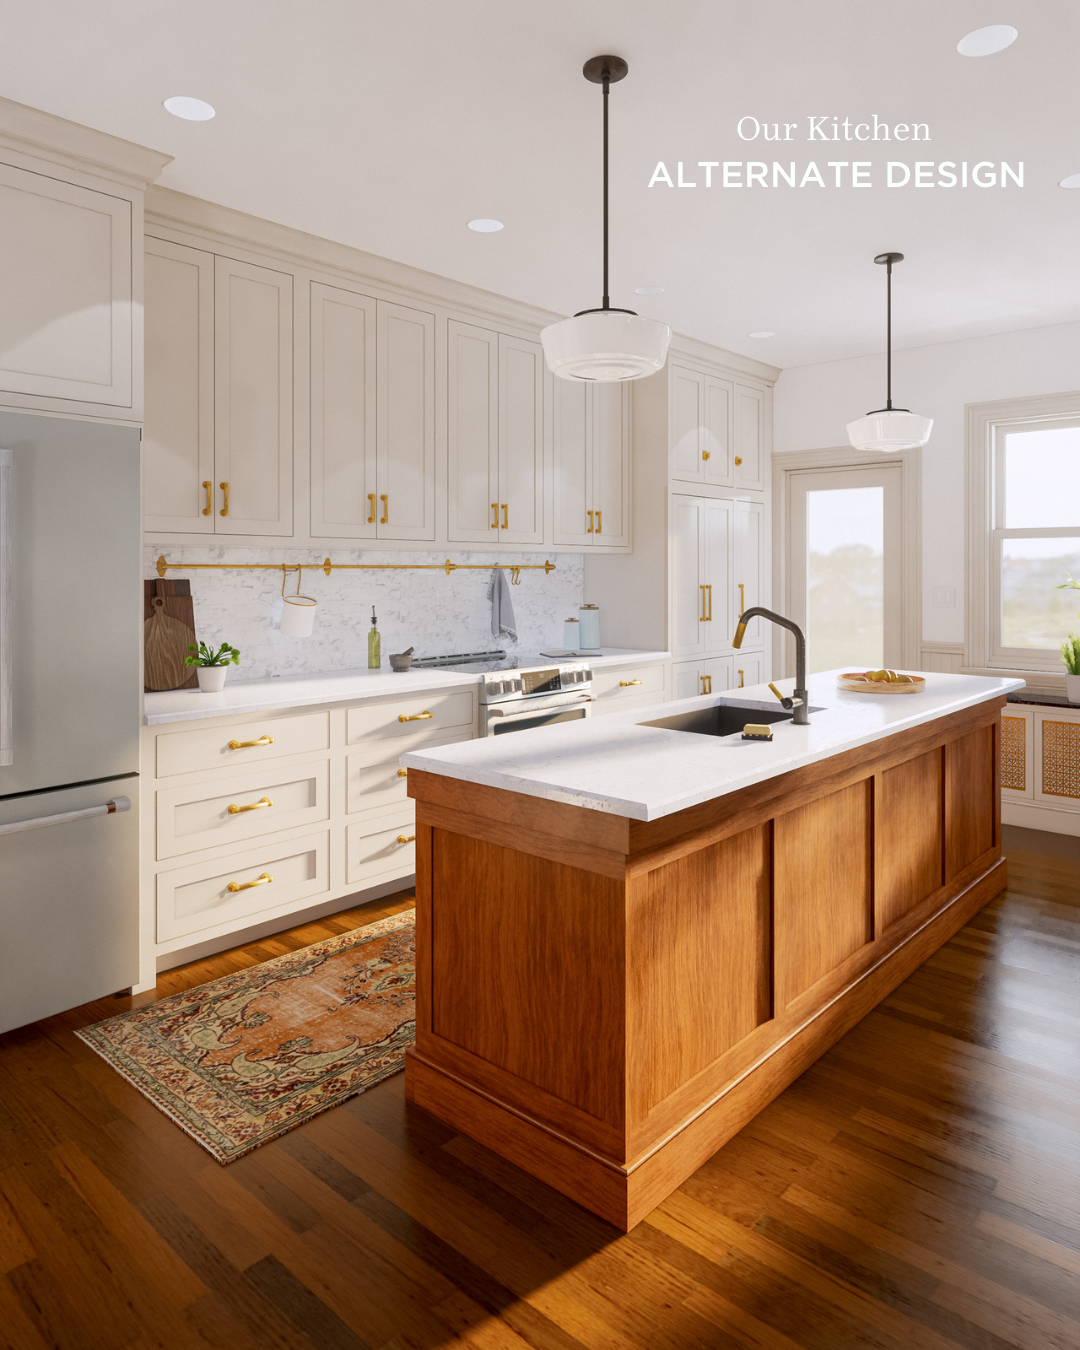
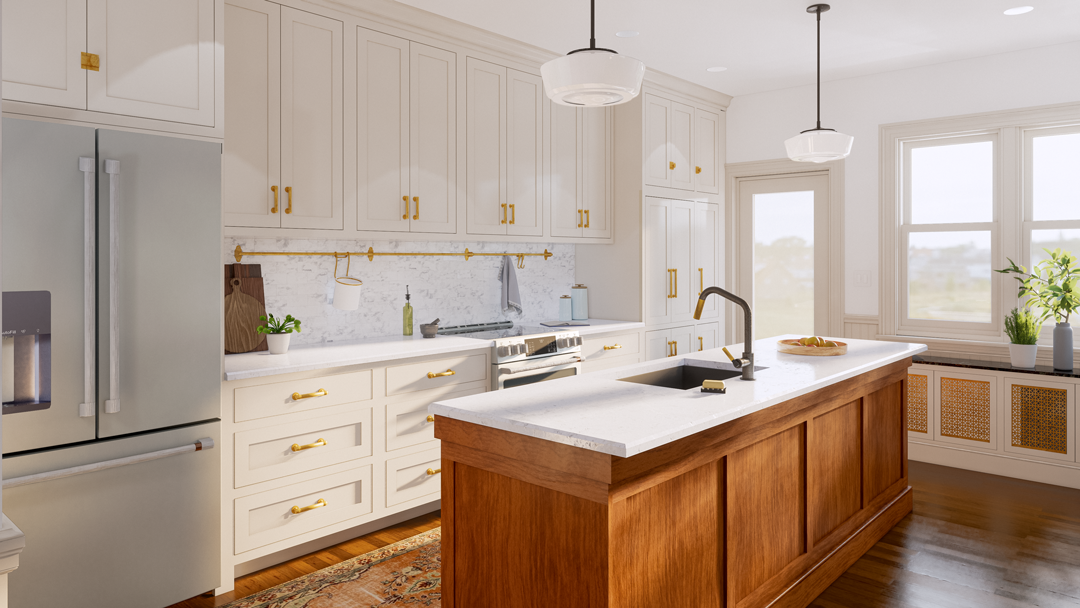
Our Alternate Design
Quick Notes
In this exercise we suggest alternatives to many of the finishes or products that we chose. This is not to say that our options were “too expensive” but we recognize that there are other options that may be more suitable at a lower budget. We stand by all of the design decisions, product choices, and partners throughout our kitchen renovation.
// Disclosure: This blog post is not sponsored. However we did perform an AD around the same time with a similar theme.
Cabinets
One of the reasons we were able to keep our kitchen budget from exploding was because we used RTA cabinets. RTA means “ready to assemble” and the entire kitchen was delivered to our doorway flat packed across five pallets. The cost savings with self assembly are massive.
We did however have a number of “upgrades”: premium finishes, custom paint (we are talking about you Barb), and other costly add-ons.
We reached out to Cabinet Joint and asked them to suggest ways of decreasing the overall cost without overly compromising our design.
Cabinet Breakdown
Our Retail Costs: $26,739.30
This cost includes the kitchen wall and island only, this is higher than what we paid over a year ago due to the increase in material costs
Suggested Modifications:
Change to standard, Colourtone paint (bye Barb)
Change doors/drawerfronts to Stockbridge style
Remove upper lift kit cabinets
Change cabinets over fridge/pantry to standard wall cabinets
Change wall cabinets in between fridge/pantry to be single opening and standard depth [increased height to account for lift cabinet removal]
Remove custom appliance panels
Remove glaze on island
Remove decorative island legs
New Retail Cost: $15,668.15 // Savings: $11,071.15
// Additional Savings: Changing from an inset cabinet to a full overlay cabinet is not only more affordable but also easier to assemble and install.
Overlay Alternate: $12,500.77 // SAVINGS: $14,238.53
// Note: If you choose to use Cabinet Joint feel free to message us for our discount code!
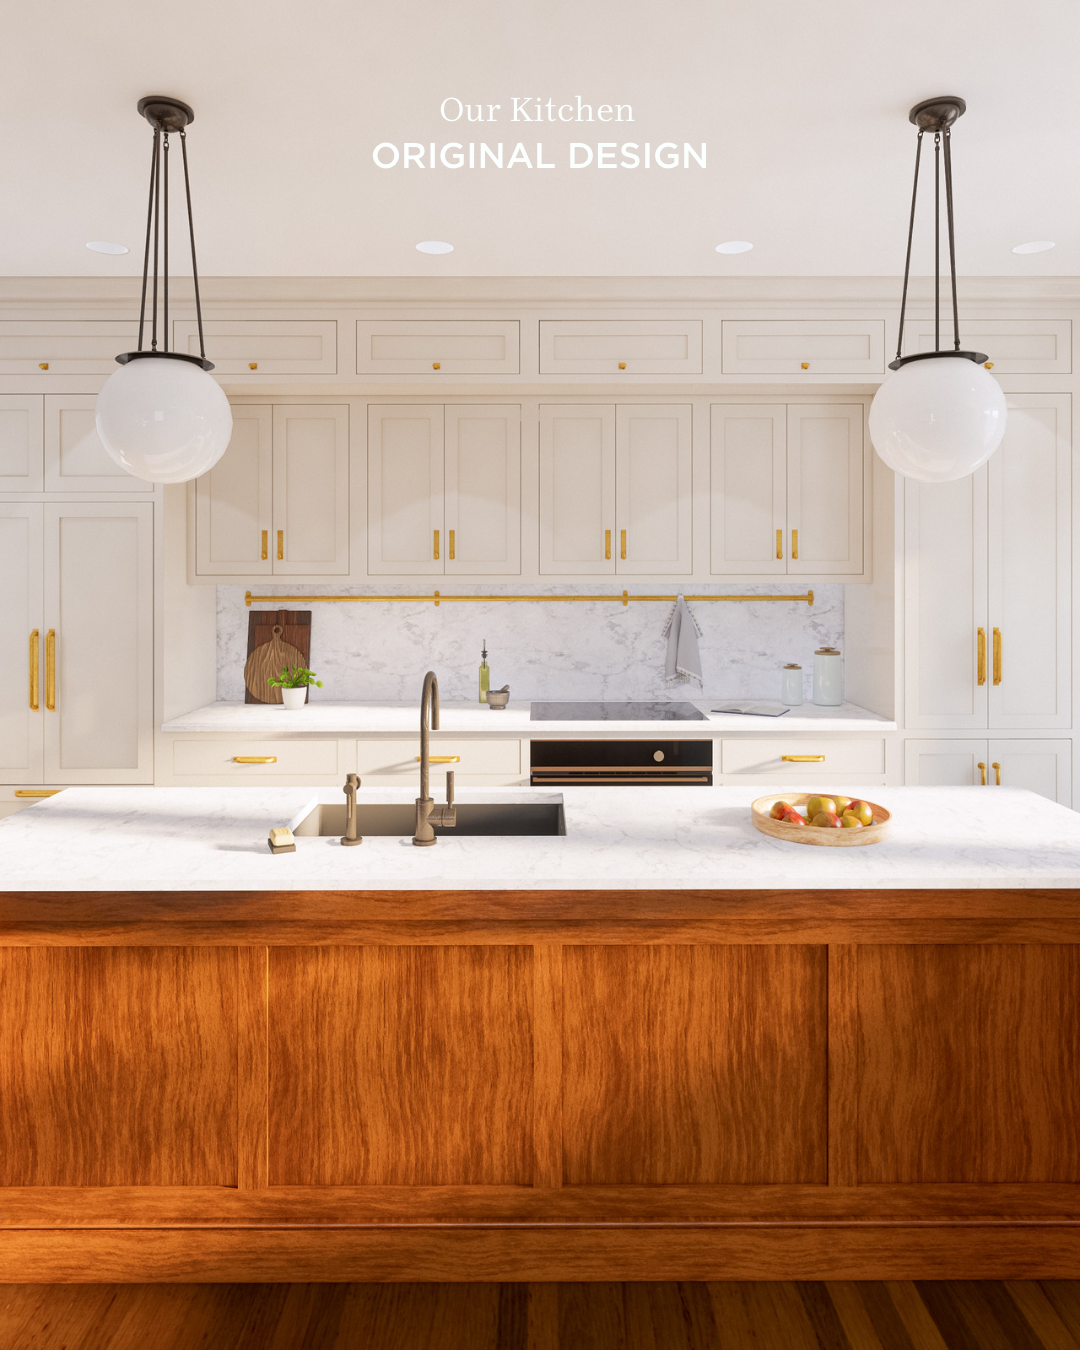
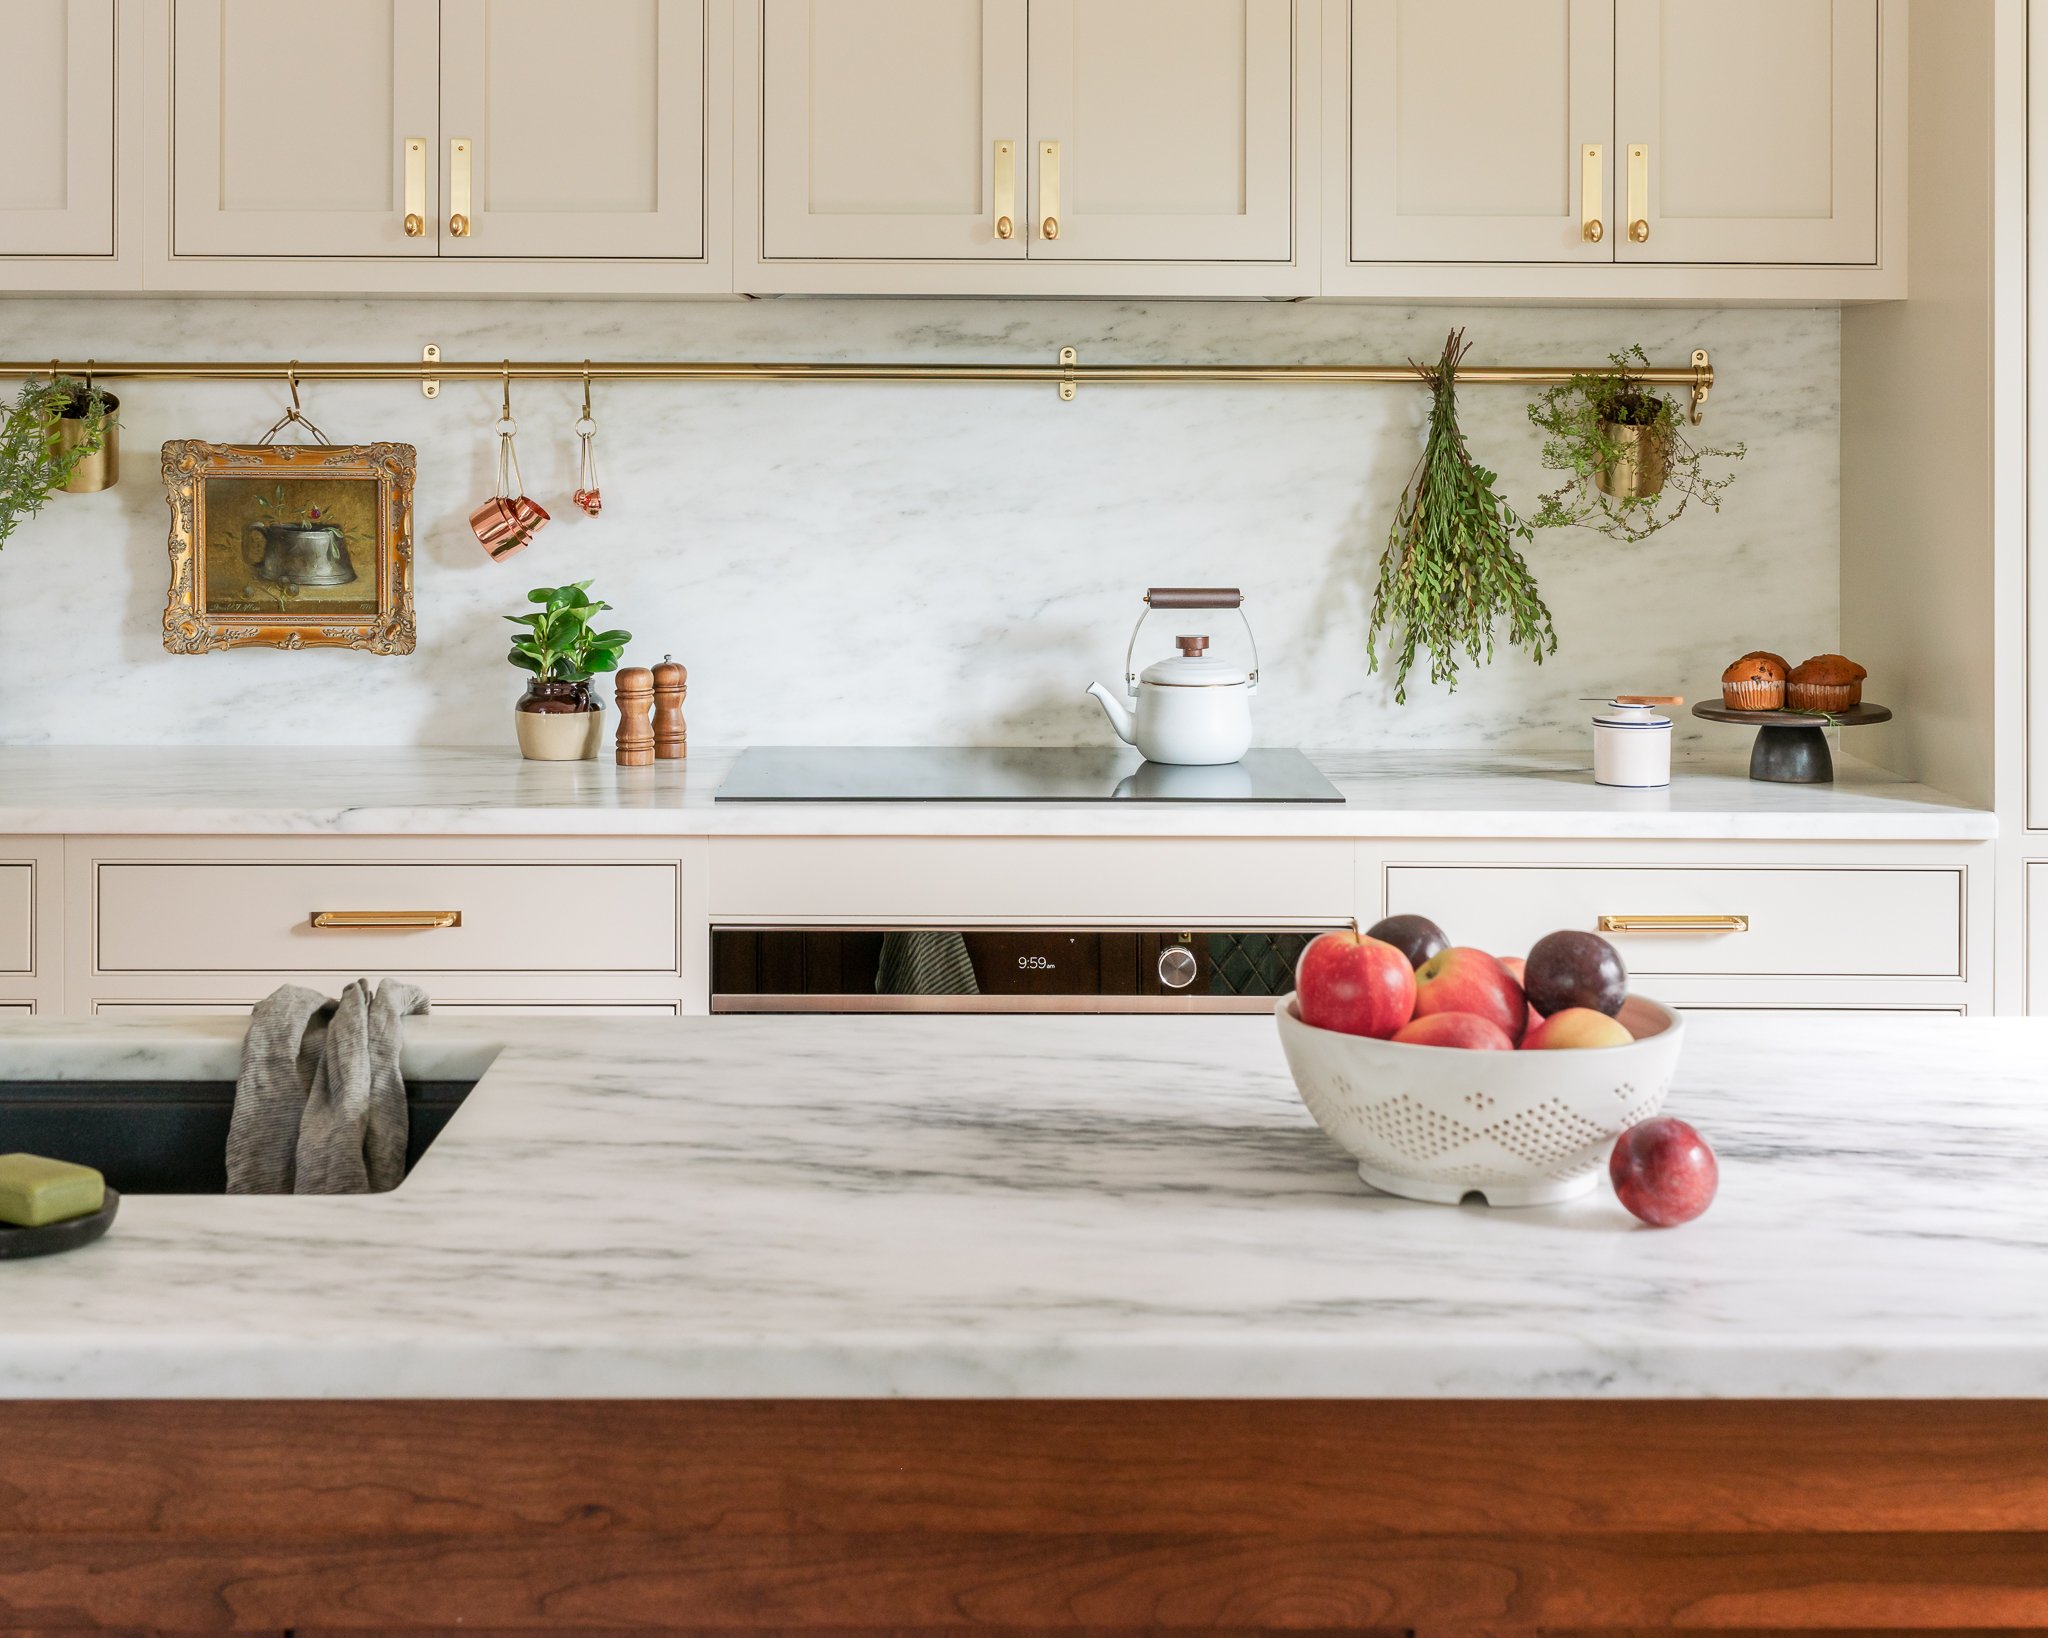
Our Original Design

Our Alternate Design
Notice the change in the upper cabinets resulting in significant savings along with the stainless appliances
Counters
One of our largest expenses was our marble island, counter, and backsplash. Not only did we use a premium stone but we had to purchase two full “slabs”. From each slab we got 2 pieces for a total of 4. We used 3 for our kitchen and the 4th is sitting comfortably in our basement.
So how do we reduce cost?
First, you don’t use stone on your backsplash.
Second, consider alternative materials.
We reached out to Metropolitan Cabinets & Countertops and they helped break down the costs for us.
Countertop BreakDown
Our Approximate Retail Cost: $14,250
Marble: Approximately $9,500
Fabrication and Installation: Approximately $4,750
Metropolitan Suggested AlternativeS:
// Note: These estimates exclude the backsplash and assume the use of a slide in range. These are also rough estimates - we suggest that you visit for more specific pricing.
Option 1: Et Calacatta Gold Polished, Silestone Quartz, 3cm: Approximately $5,000 + tax
Option 2: Bianco Carrara Polished, Marble, 3cm: Approximately $5,600 + tax
New Approximate Retail Cost: ~$5,250 // Savings: ~$9,000
Backsplash approximate Costs: +~$500
For this exercise we chose 3x6 marble subway tile that costs $0.71 per piece. Our backsplash is 20 sqft so our total tile cost is $122. Of course we need some tools and materials so we are going to use a placeholder of $500 for this project (DIY style).

Et Calacatta Gold Polished

Bianco Carrara Polished, Marble
We are so thankful to Metcabinet for helping with this project. We wanted to remind you that unlike cabinets, stone can very in both form and cost. We recommend visiting a showroom to discuss options for your project!
Appliances
This is by far the easiest category for estimating costs because it is much easier to calculate. We used Fisher & Paykel appliances throughout our kitchen, they are great quality and we highly recommend them. We also used a Landmark beverage fridge in our island. We do understand that these are “higher end” appliances and that comes with a premium. We also incurred more costs by choosing integrated (or panel ready) appliances. Not only do you need to have the panel made but they also take a lot of time (labor) to install properly.
We didn’t need any help on this one and broke down all the costs for you here:
Appliance Breakdown
Our Retail Cost: $17,894
Fridge: $4,799
Cooktop: $2,599
Vent: $1,549
Wall Oven: $4,999
Dishwasher: $1,699
Beverage Fridge: $2,249
Option 1: Fisher & Paykel Kitchen Package: $10,100 // Savings: $7,794
This package is provided by Yale Appliance and at the time of writing this is on sale. The package includes the refrigerator, gas range, vent, and dishwasher. We are excluding the beverage fridge for this exercise.
Option 2: Packaged Alternatives: $3,500 - $7,500 // Savings: ~$12,000
Appliance suites really run the range (especially this time of year) and we found the most common price range from a Home Depot or Lowes. This option also excludes the beverage fridge.

Our Original Design

Our Alternate Design
Notice the removal of the beverage fridge, stainless appliances, new pulls, kitchen faucet, and island pendants.
Hardware
Last but not least, let’s tackle hardware. We have discussed the importance of well made hardware in the past - as it is the most tactile part of your kitchen. And if it were up to us we wouldn’t change a thing. However, in the spirit of this exercise, we have sourced some alternatives.
Hardware Detail
Hardware - Our Approximate Retail Cost: $6,000
Pulls / Backsplash Bar: $4,500
Island Pendants: $1,500
Hardware - Alternatives: ~$2,000 // Savings: $4,000
Pulls: $1,000
// Note: To calculate hardware pulls we used build.com to choose a line of pulls that were of average price. We rounded up on the hardware cost to an even $1,000.
Backsplash Bar: Ikea Alternative ~$100
Island Pendants Options:
Golden Lighting Ingalls 16 Inch Large Pendant: $630 (for 2)
Rose City 8” Fitter Chain Pendant configured with 16” Opal: $798 (for 2)
Sink & Faucet: Our COst: $6,190 // Alternative Solutions: ~$790 // Savings: ~$5,400
Faucet Retail Cost: $5,800
We are allotting a $400 budget for a new faucet
Sink: $390
We are keeping the same sink because its both affordable and well made
Final Breakdown
Cabinets
Our Price: $26,739
Alternative Options: $12,500 - $15,668
Savings: $11,071 - $14,239
Counters
Our Price: $14,250
Alternative Options: $5,250
Savings: $9,000
Appliances
Our Price: $17,894
Alternative Options: $5,500 - $10,100
Savings: $7,794 - $12,394
Hardware
Our Price: $12,190
Alternative Options: $2,790
Savings: $9,400
Totals
Our Price: $71,073
Our remaining costs were in the pantry, radiator box, hardware/lights for those areas, misc items, and laborNEW PRICE RANGE: $26,040 - $33,808
Savings Range: $37,265 - $45,033
Savings Percent: 37-47%
Summary
We have had a lot of fun going through this exercise and hope that you found it helpful. Please keep in mind, budgets vary dramatically from person to person but everyone deserves the opportunity to live somewhere they love.
We hope to have demonstrated that you don’t need the most expensive thing on the market to build something beautiful.